Անվտանգության սերվերի կարգավորման ուղեցույց
Անվտանգության սերվերը-ի (Security Server) տեղակայումից հետո, անհրաժեշտ է այն միացնել X-Road ցանցին և Կենտրոնական սերվերի (Central Server) configuration anchor-ին․
1․ Վերբեռնեք anchor-ը անվտանգության սերվերում և կատարեք նախնական կարգավորումները,
2․ բացեք soft token-ները և ավելացրեք ժամանակային դրոշմի ծառայությունը (timestamping service),
3․ ստեղծեք CSR-ներ auth և sign սերտիֆիկատների համար,
4․ վերբեռնեք սերտիֆիկատները, ակտիվացրեք և գրանցեք նույնականացման սերտիֆիկատը (authentication certificate),
5․ ստեղծեք առաջին ենթահամակարգը (subsystem) և ուղարկեք գրանցման հարցումը։
Նախնական կարգավորում
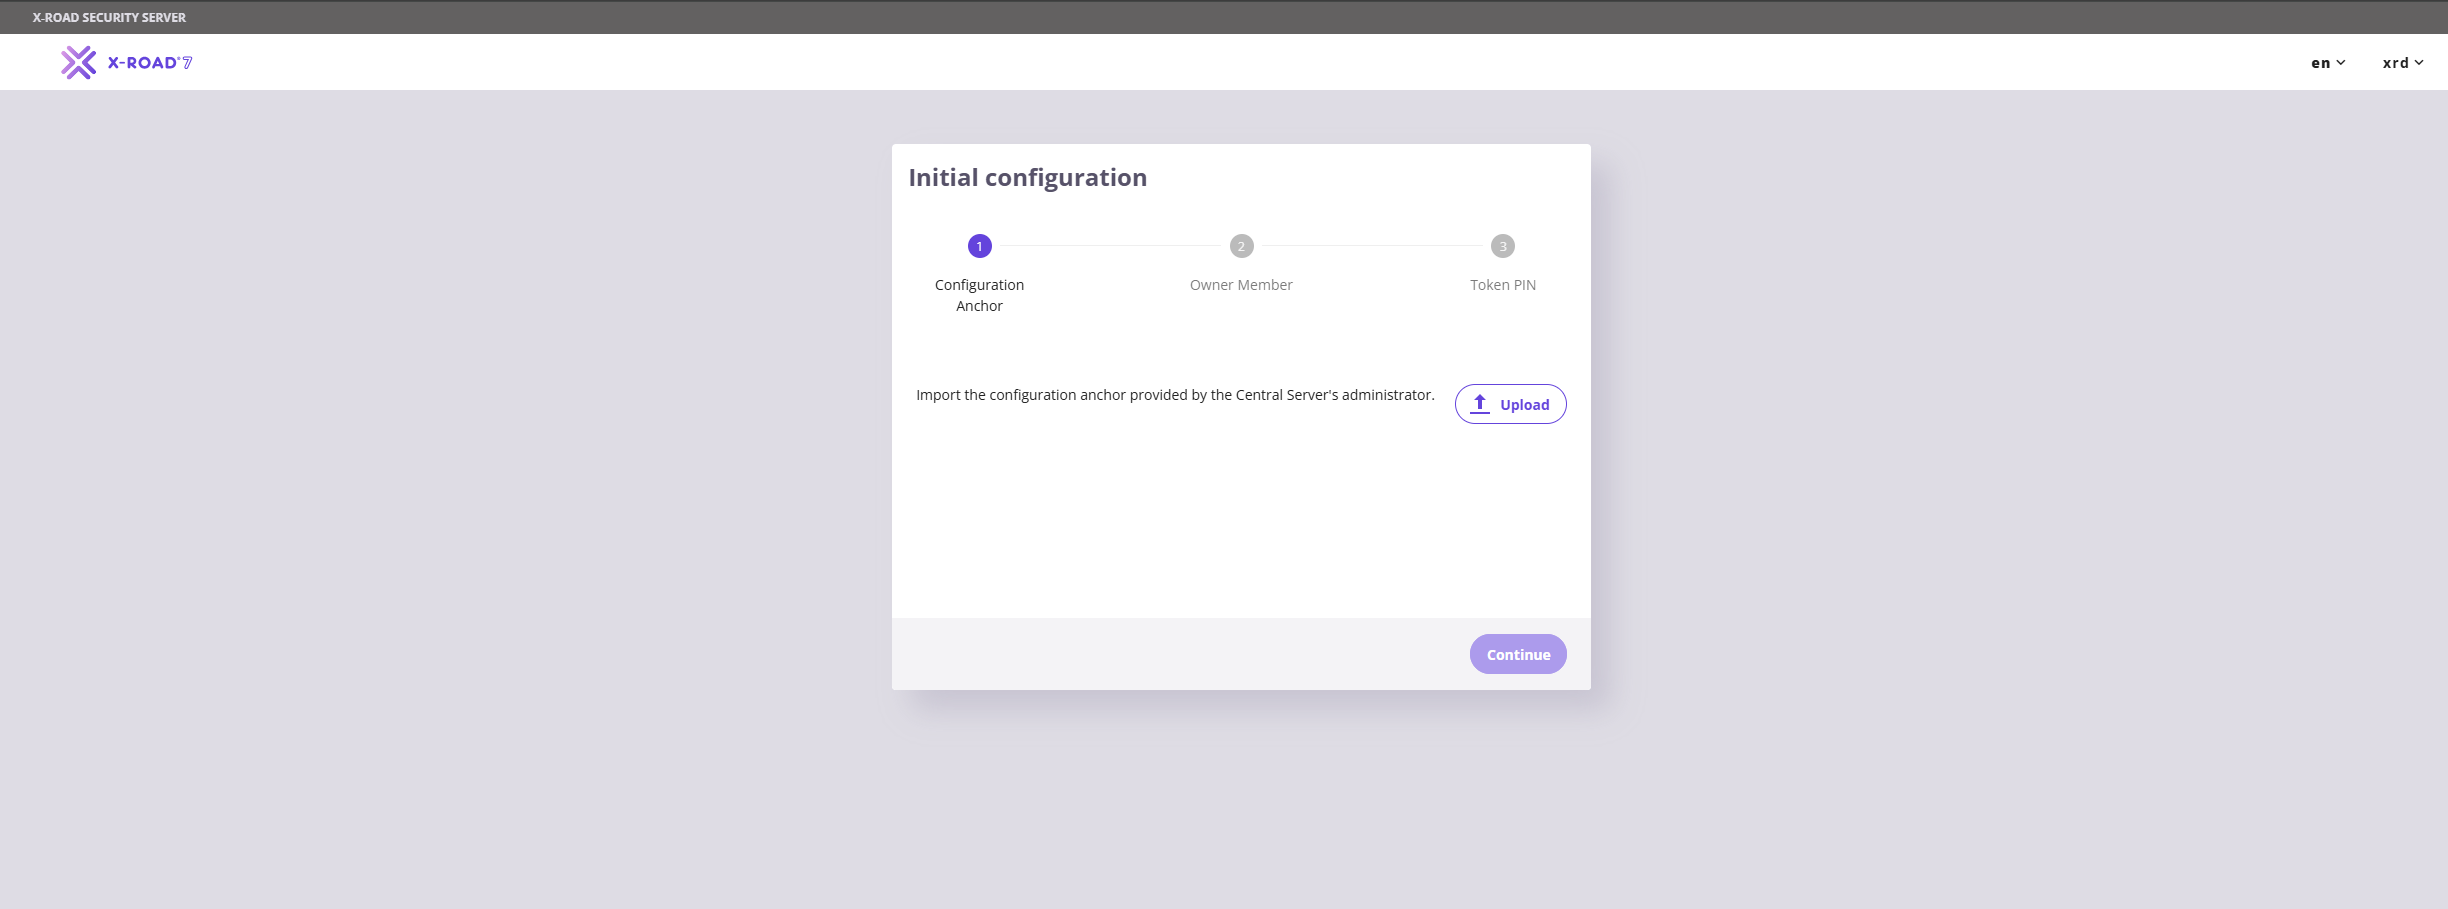
Տեղակայումն ավարտելուց հետո անցեք Admin UI պորտ 4000-ով։ Կբացվի նախնական կարգավորման էկրանը, ինչպես ցույց է տրված ստորև նկարում։ Վերբեռնեք ՀՏՀԳ-ից ստացված configuration anchor-ը և սեղմեք «Continue»։
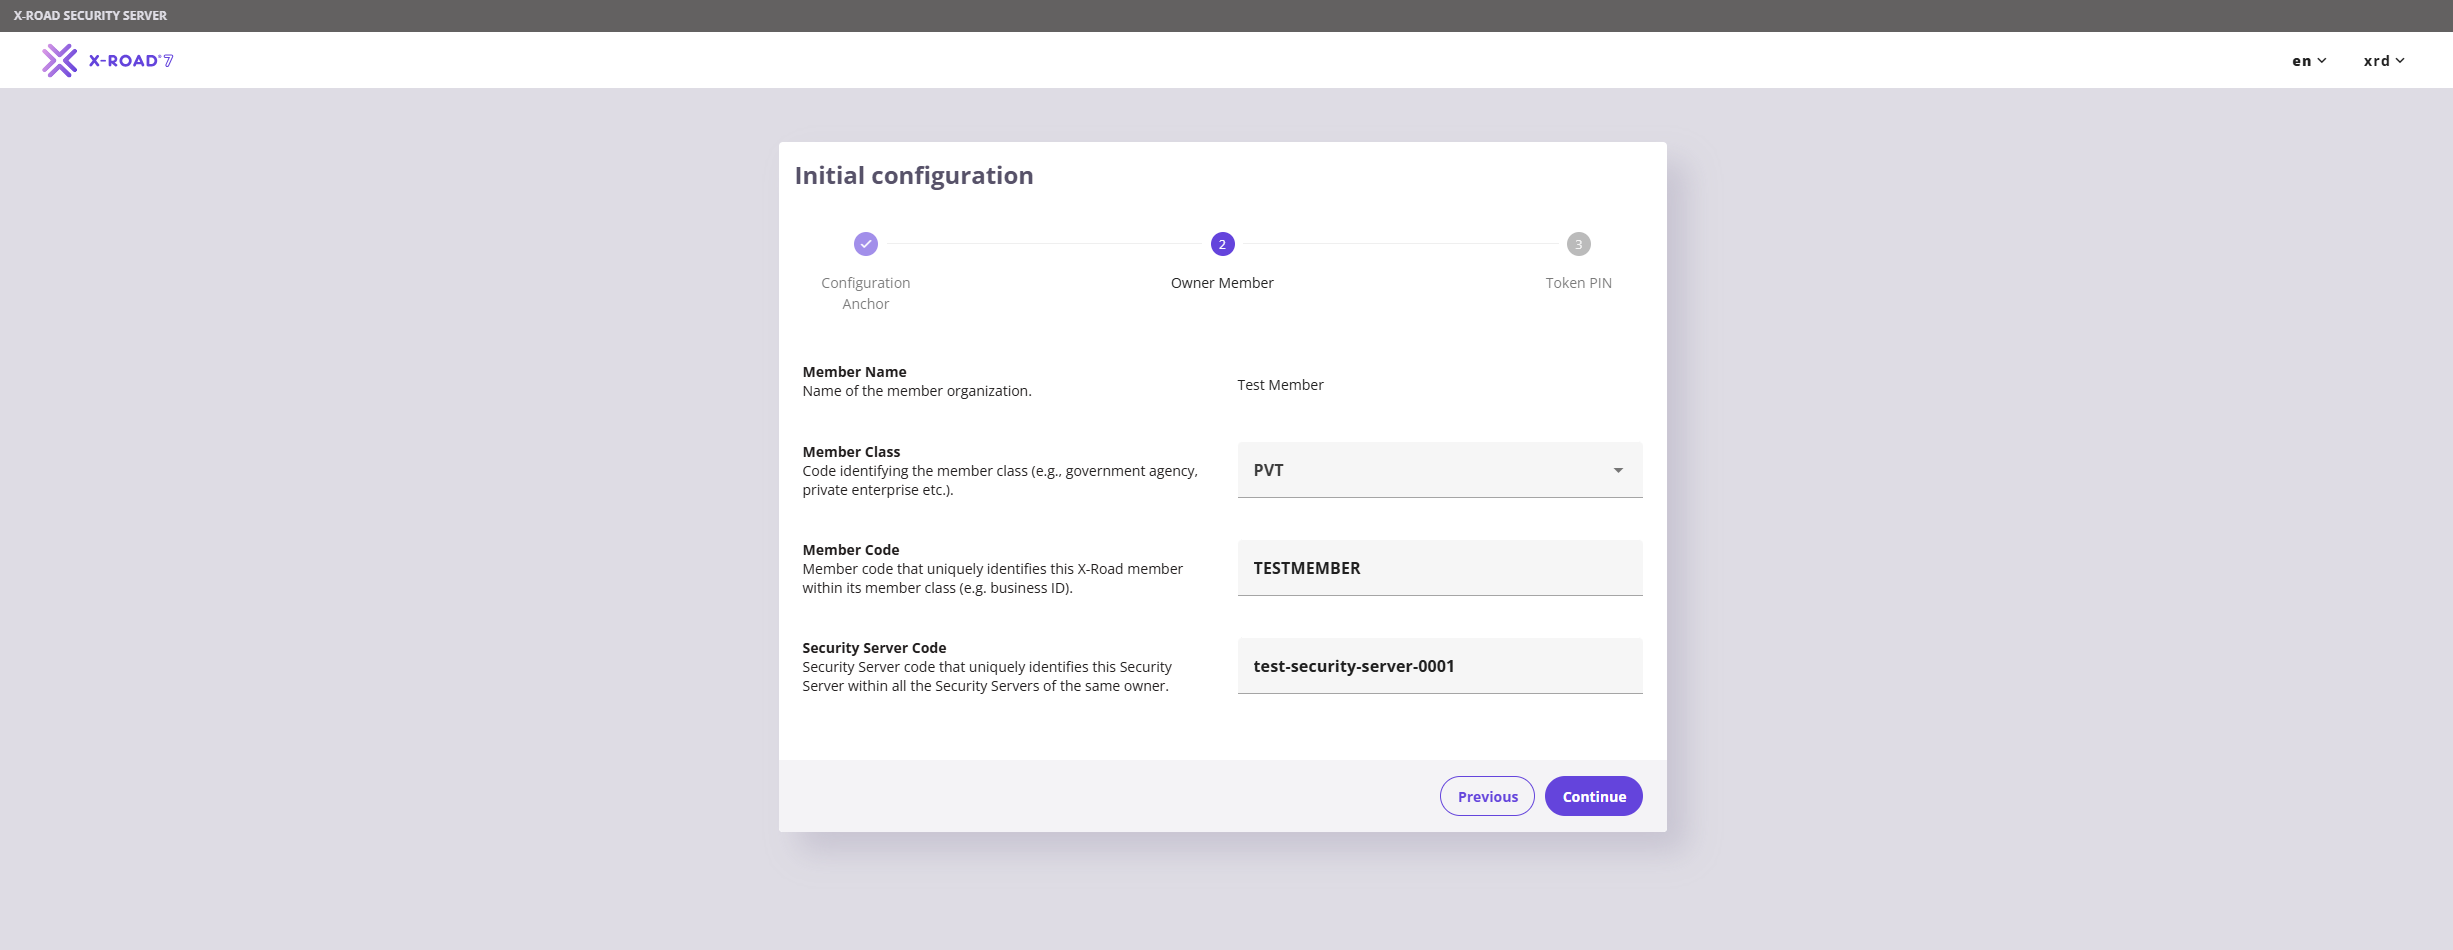
Հաջորդ էջում ընտրեք «Member Class», «Member Code» և սահմանեք անվտանգության սերվերի կոդը (Security Server Code)։ Առաջին երկու արժեքները տրամադրվում են anchor-ի հետ միասին, ուստի անհրաժեշտ է կիրառել դրանք և ինքնուրույն սահմանել Անվտանգության սերվերի կոդը։ Ներկայումս թեստային միջավայրի համար անվանման կանոնակարգ գոյություն չունի։
Ստորև ներկայացված է test member-ի համար նախատեսված արժեքների օրինակը, որը կօգտագործվի այս ուղեցույցի համար։
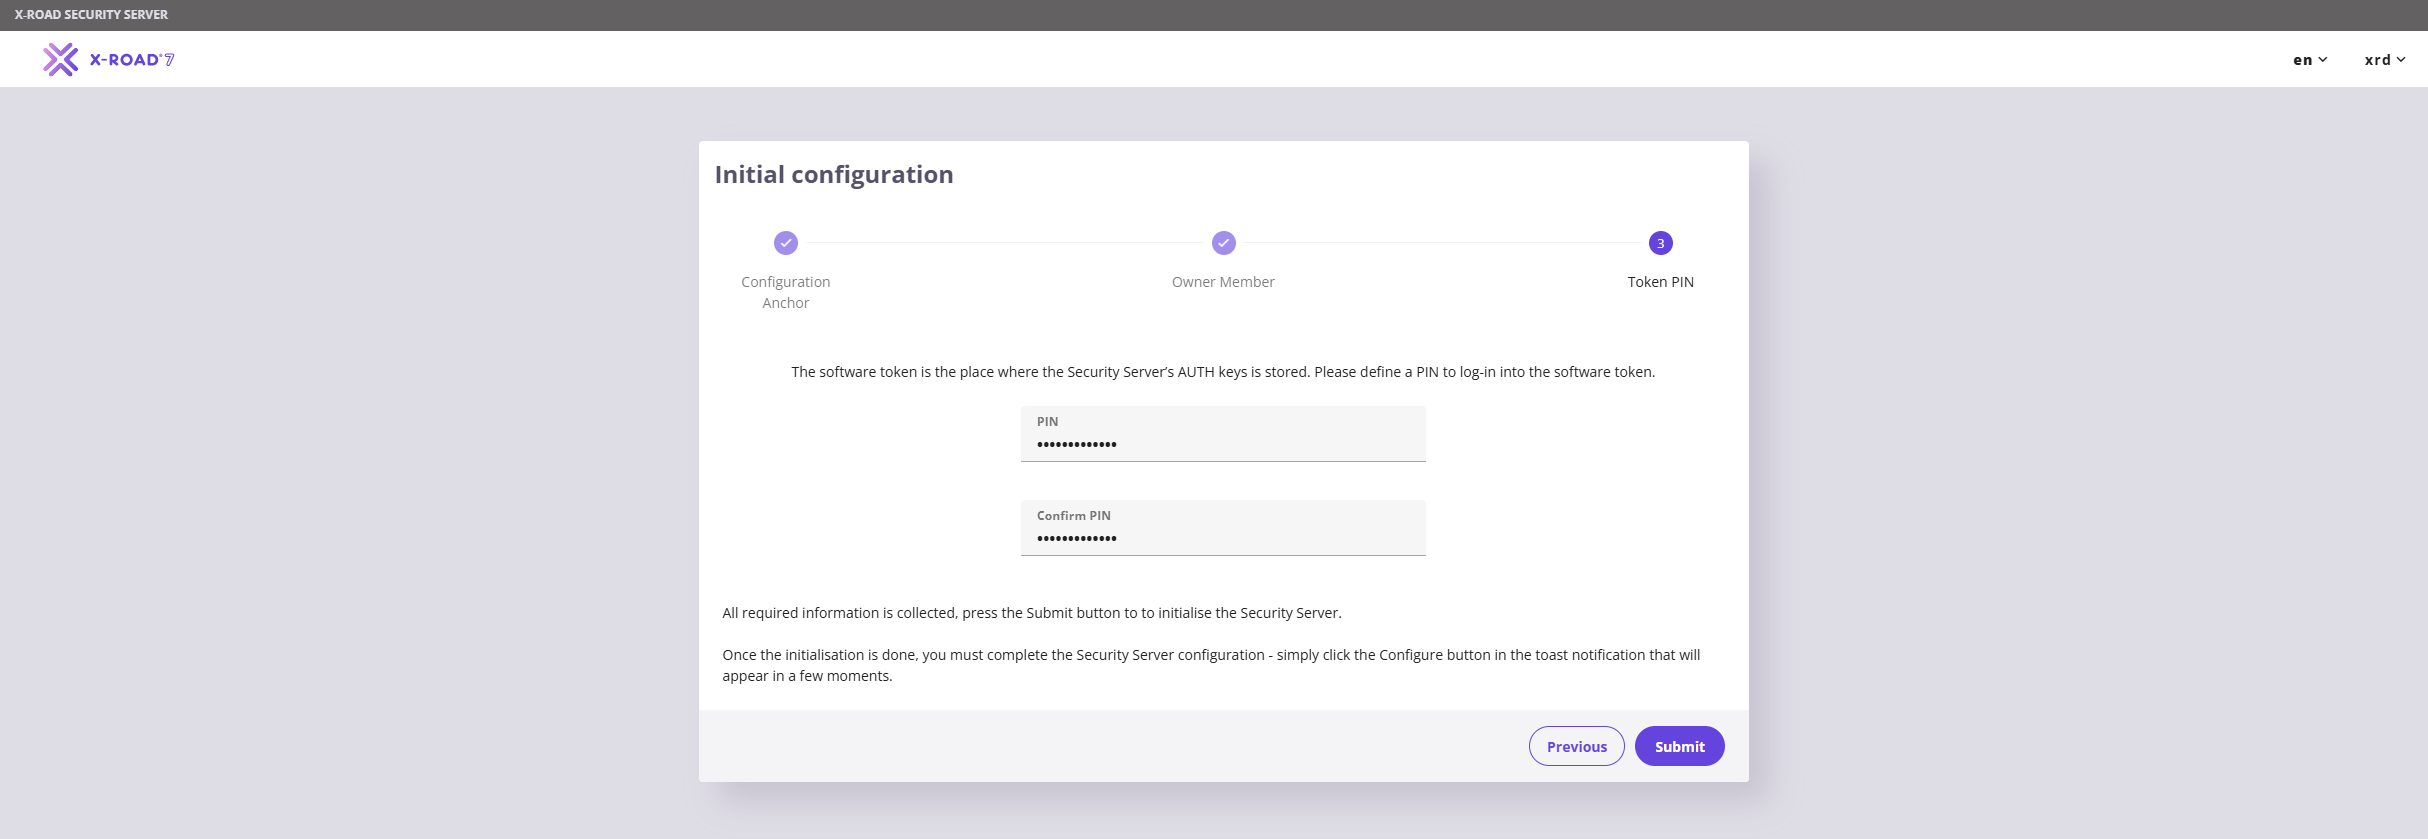
Վերջին քայլը Անվտանգության սերվերի համար PIN կոդ սահմանելն է: Այն պետք է լինի առնվազն 10 նիշ և պարունակի մեծատառեր, փոքրատառեր, նշաններ և թվեր:
Նույնականացման և ստորագրման սերտիֆիկատներ (Auth and Sign Certificates)
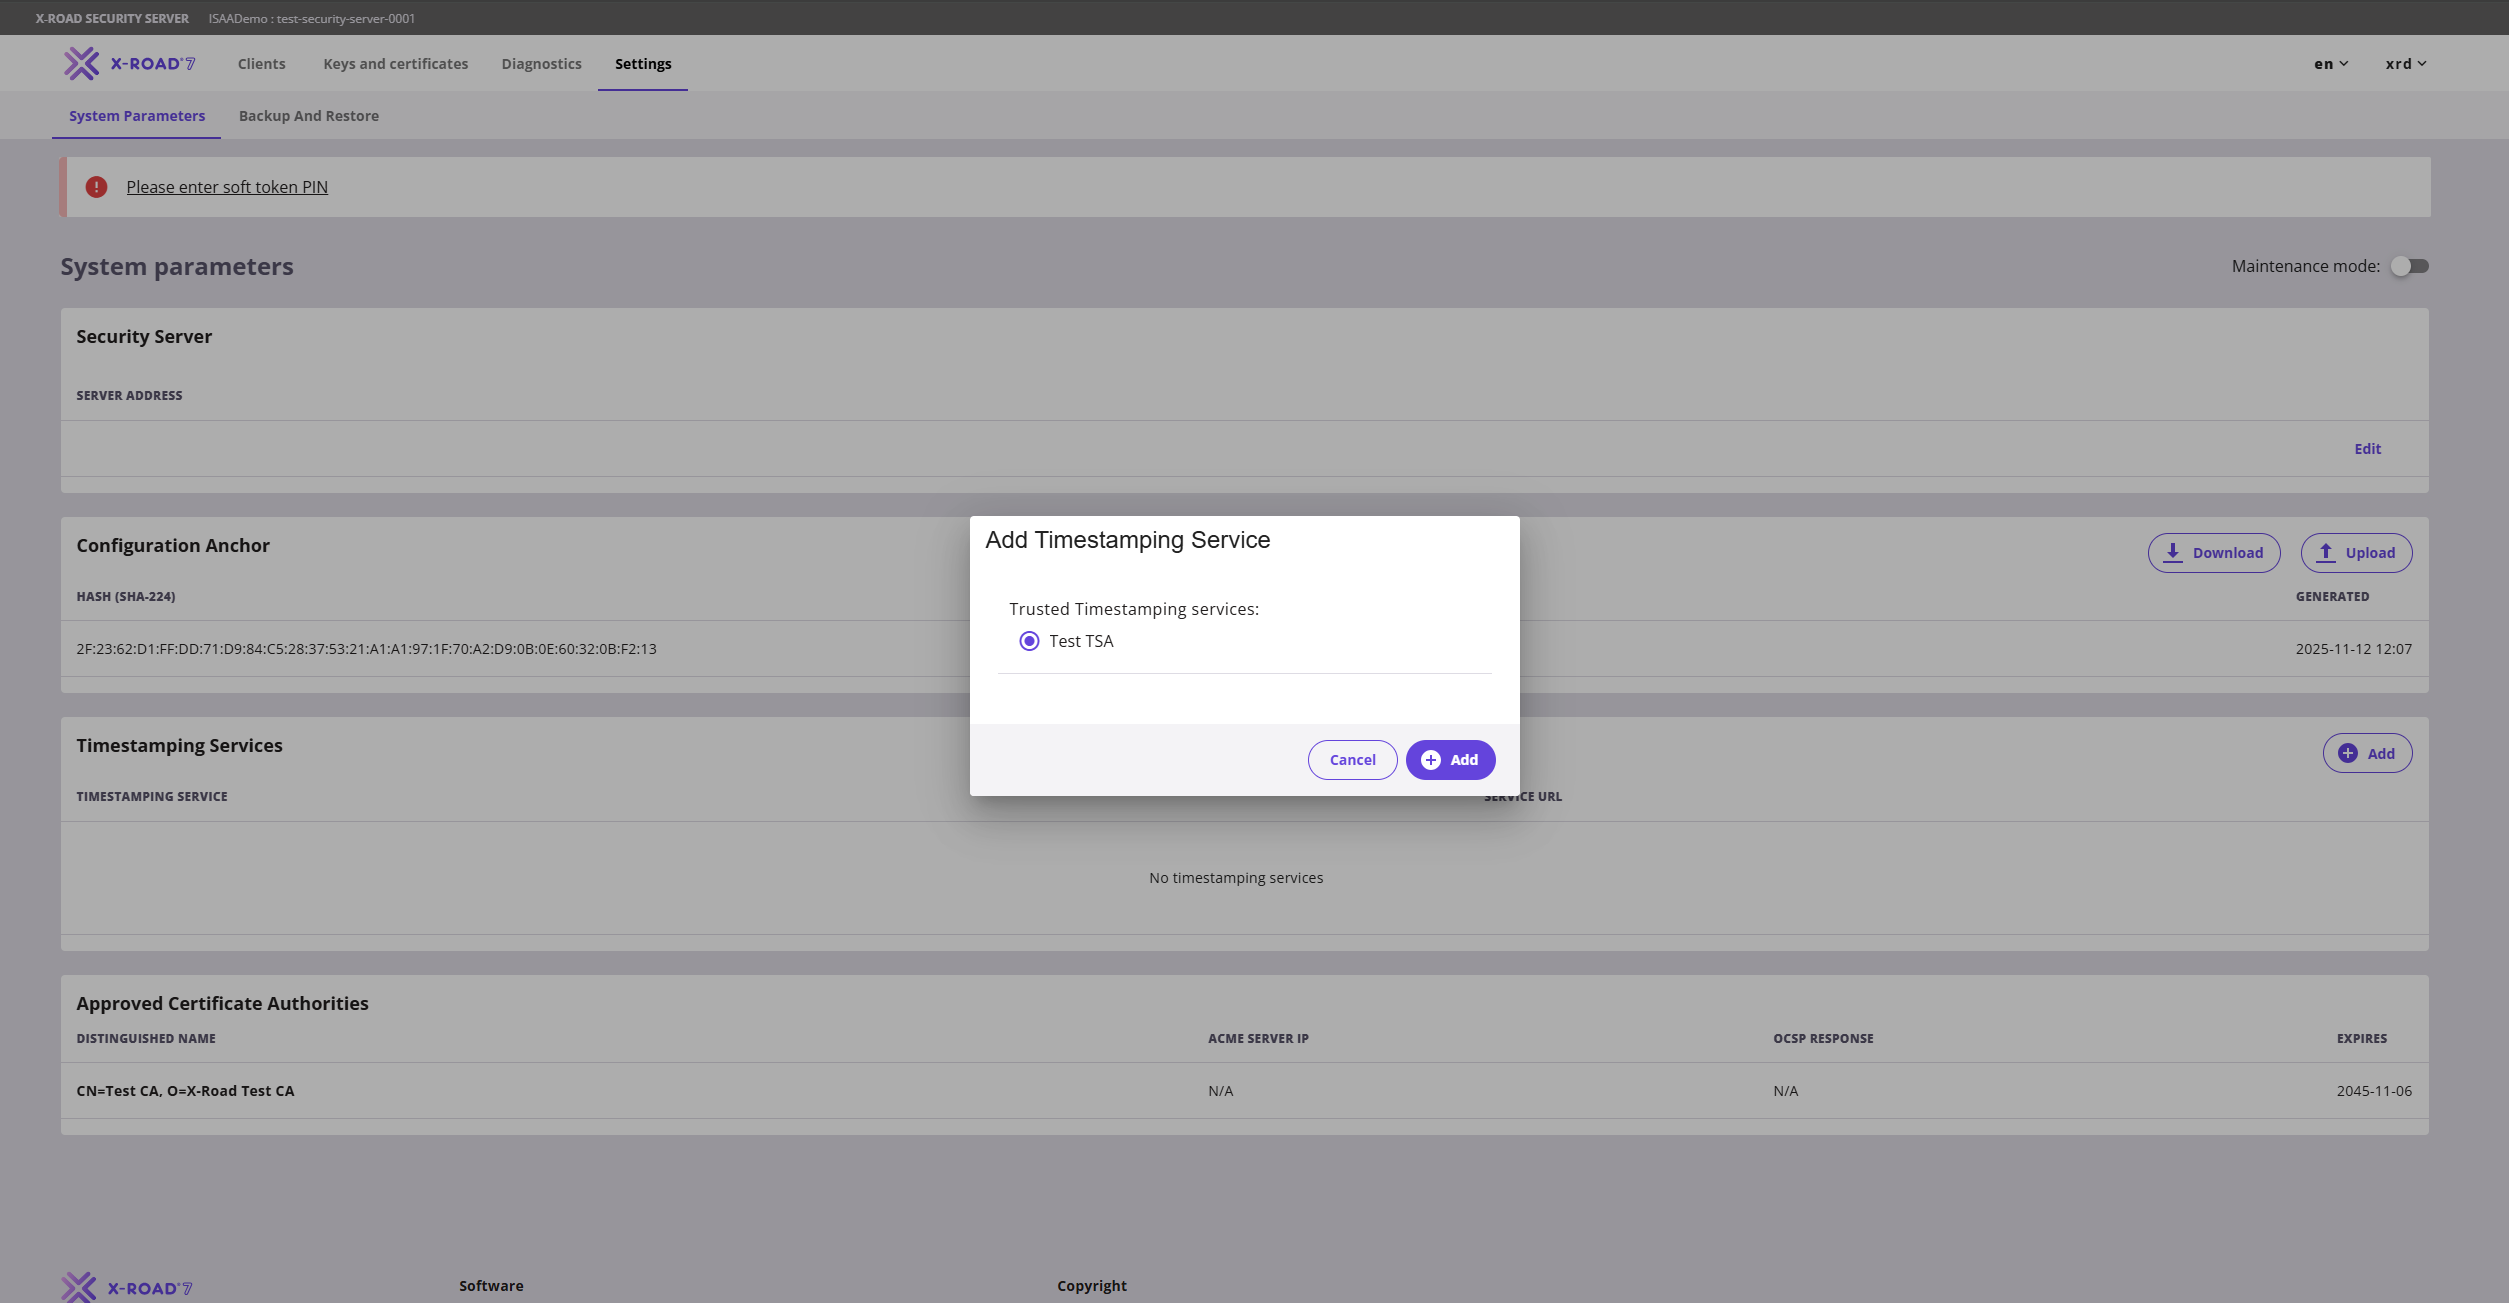
Նախնական կարգավորումն ավարտելուց հետո մենյուից մուտք գործեք «Settings» և ավելացրեք ժամանակային դրոշմի ծառայությունը։ Ներկայումս հասանելի է միայն Test TSA-ն։
Այնուհետև անցեք «Keys and Certificates» և մուտք գործեք soft token store՝ սեղմելով «Log In» կոճակը և մուտքագրելով PIN-ը։ Մուտք գործելուց հետո անհրաժեշտ է ավելացնել երկու սերտիֆիկատ՝ ստորագրման (signing) և նույնականացման (authentication) համար։

Ավելացնել ստորագրման բանալի (Signing key)
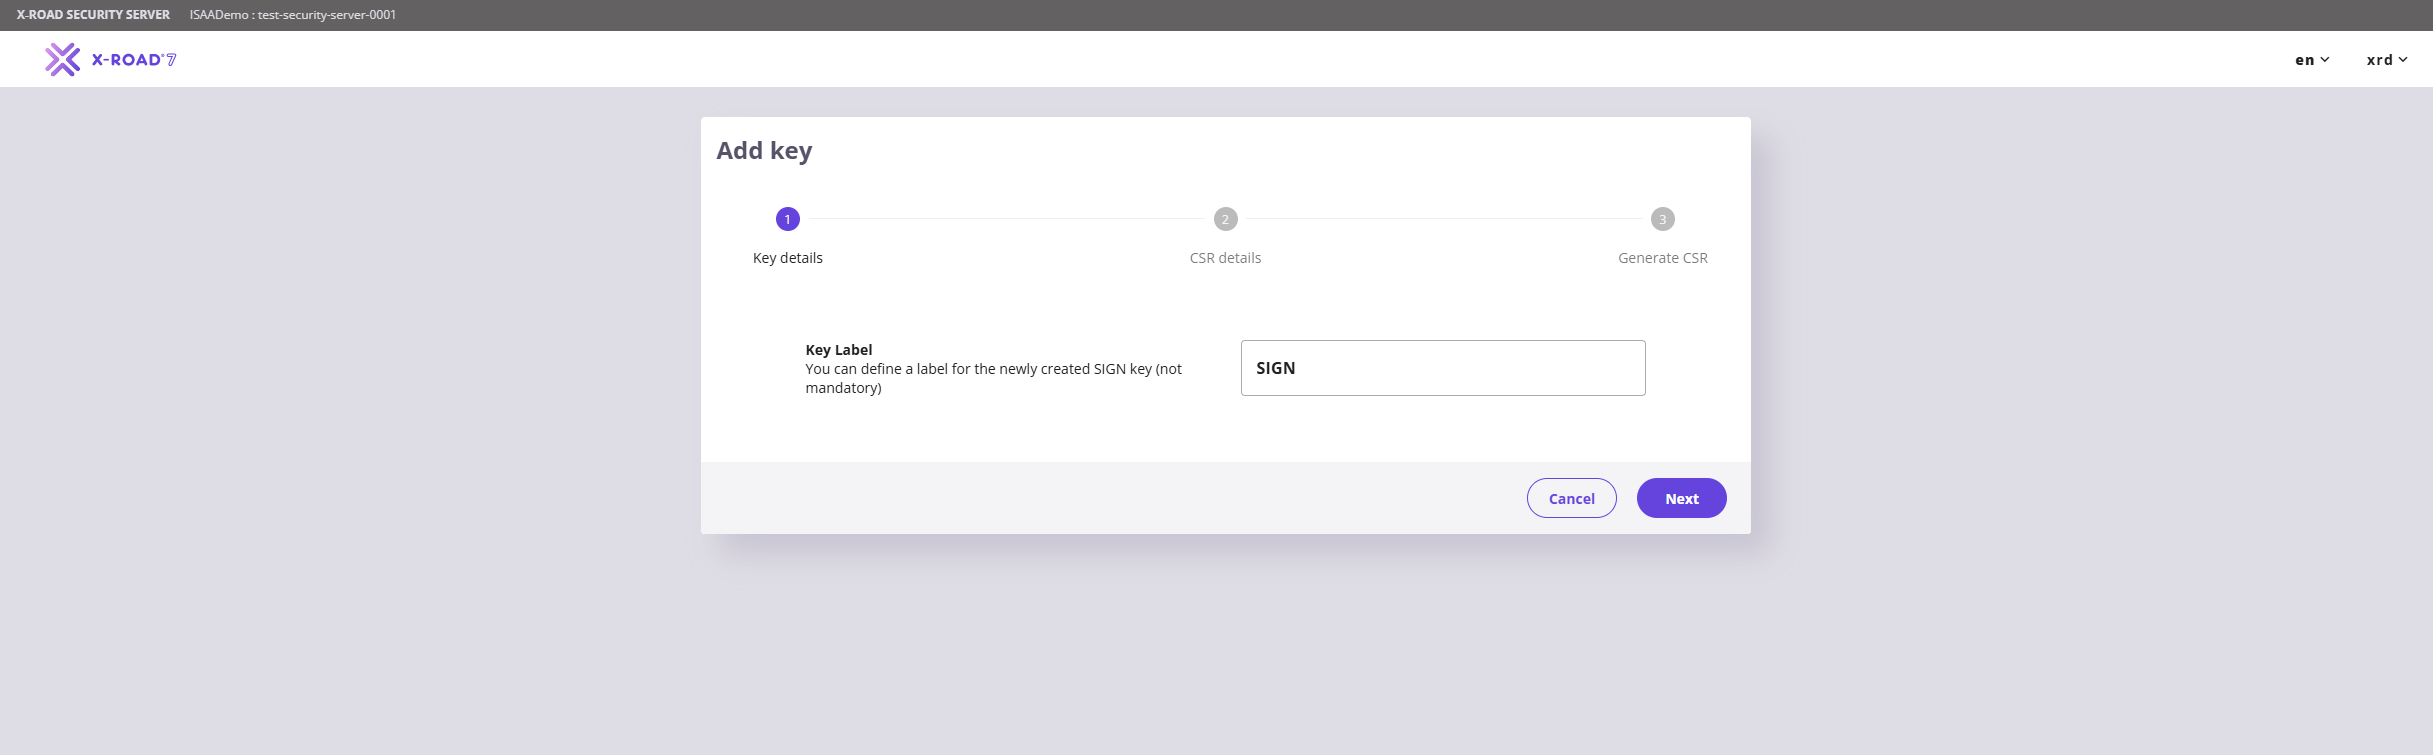
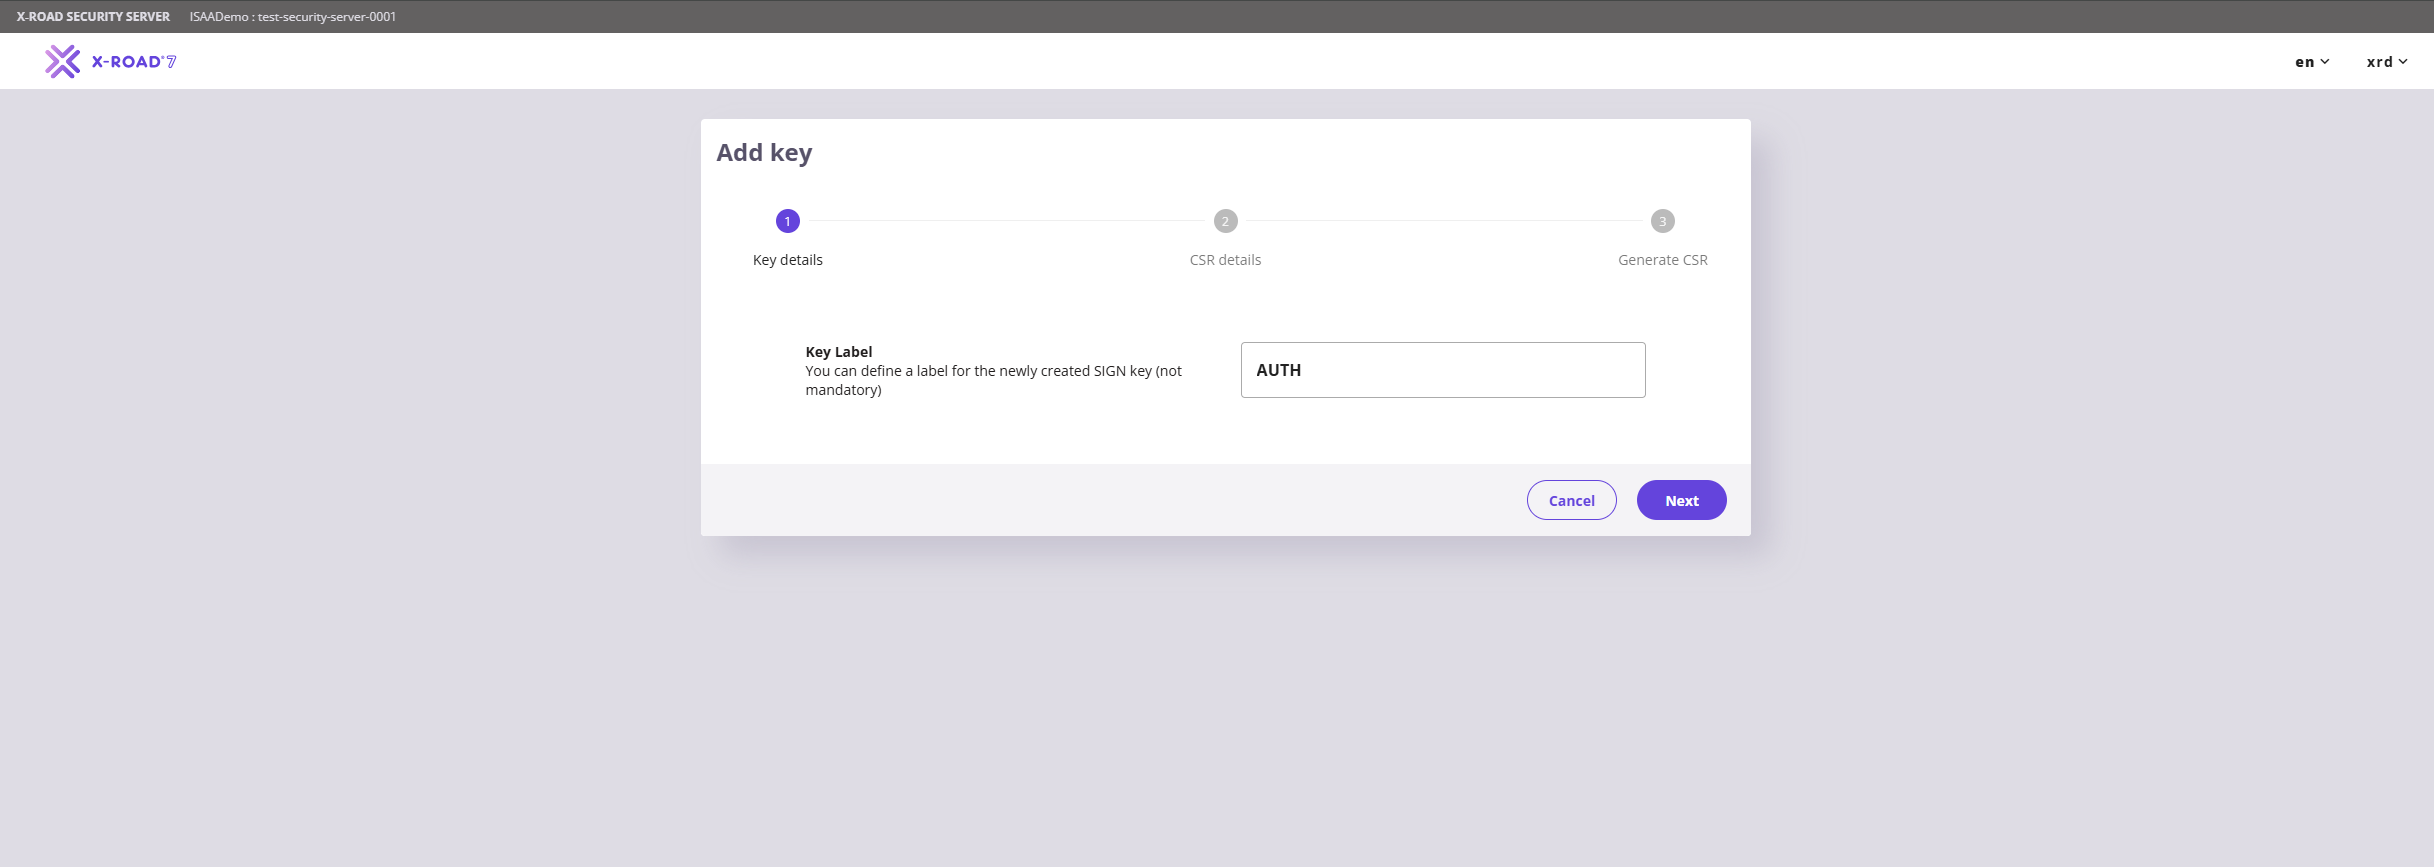
«Keys and Certificates» էջի «softToken-0» բաժնում սեղմեք «Add Key»: Բացված էջում մուտքագրեք key label-ը (սովորաբար SIGN կամ AUTH) և սեղմեք «Continue»։
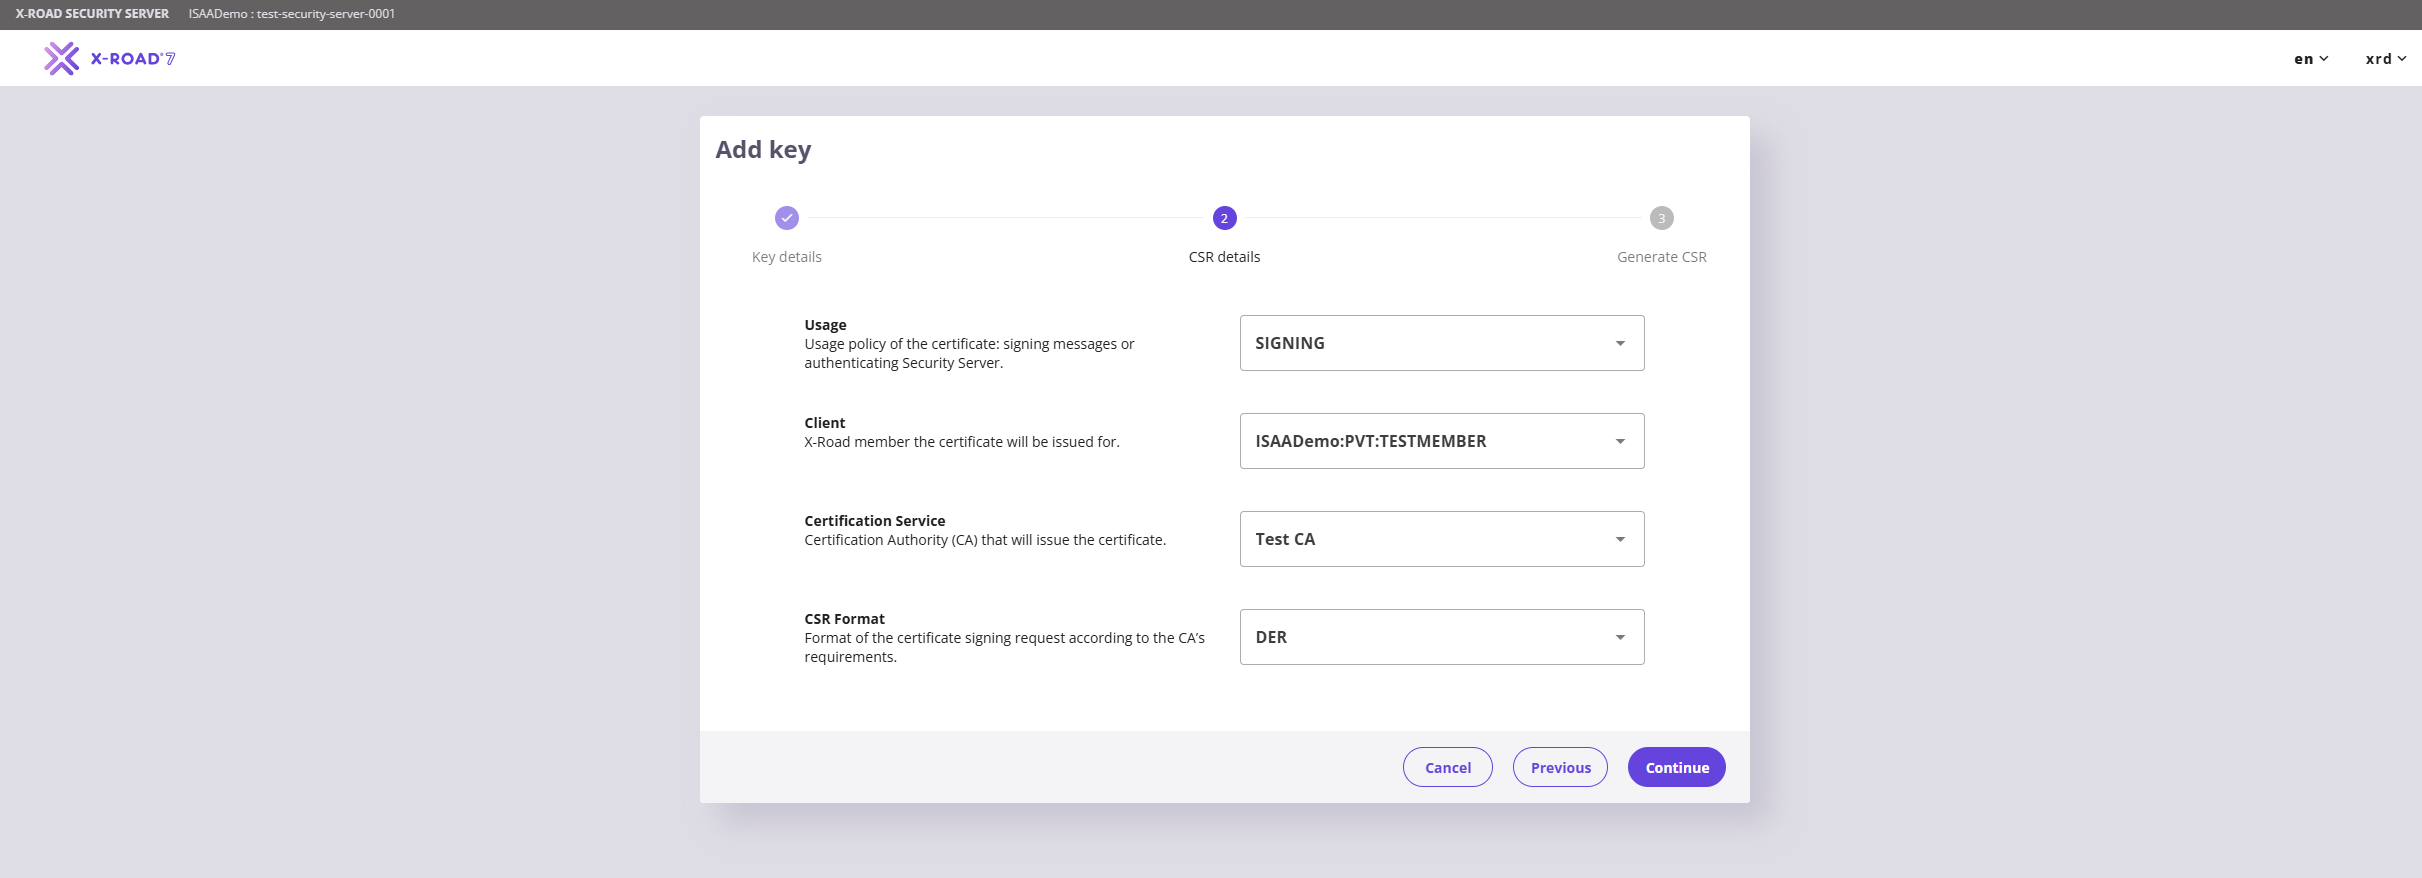
Հաջորդ էջում սահմանեք «Usage» բանալին (key) «SIGNING», ընտրեք միակ հասանելի «Client»-ը և «Certification Service»-ը սահմանեք «Test CA»։
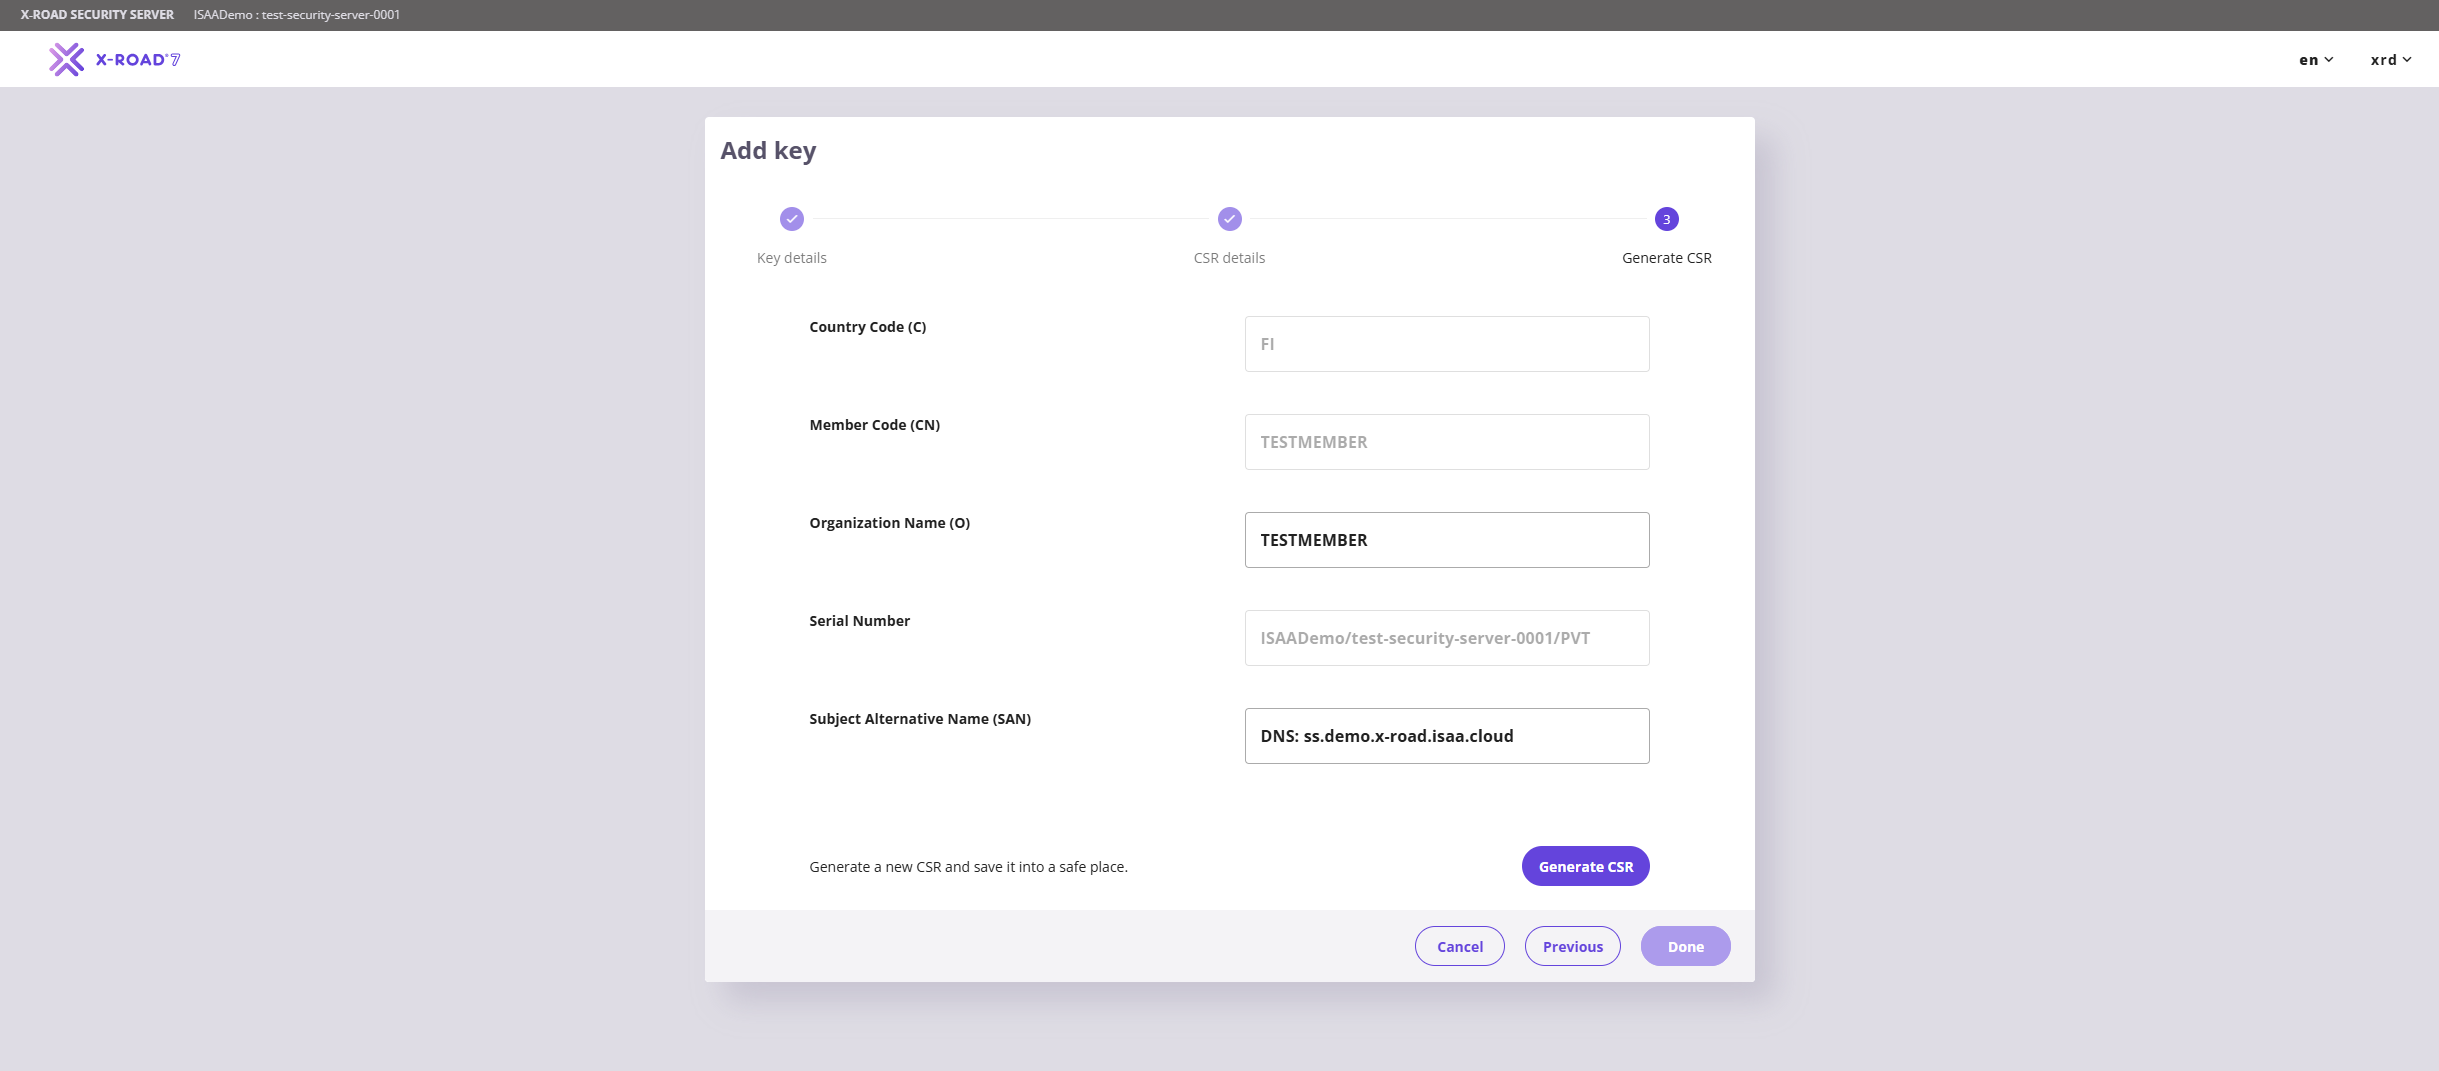
Սահմանեք «Organization Name (O)»-ում այն նույն արժեքը, որը սահմանված է «Member Code»-ում։ «Subject Alternative Name (SAN)»-ի համար լրացրեք հետևյալ տարբերակներից մեկը՝
- DNS:
security-server.dns-name.am - IP:
ip-address-of-the-server
Ձեր օգտագործած IP հասցեն կամ DNS անվանումը պետք է ապահովի անվտանգության սերվերի հանրային պորտերի (5500 և 5577) հասանելիությունը։
Սեղմեք «Generate CSR», այնուհետև՝ «Done»:
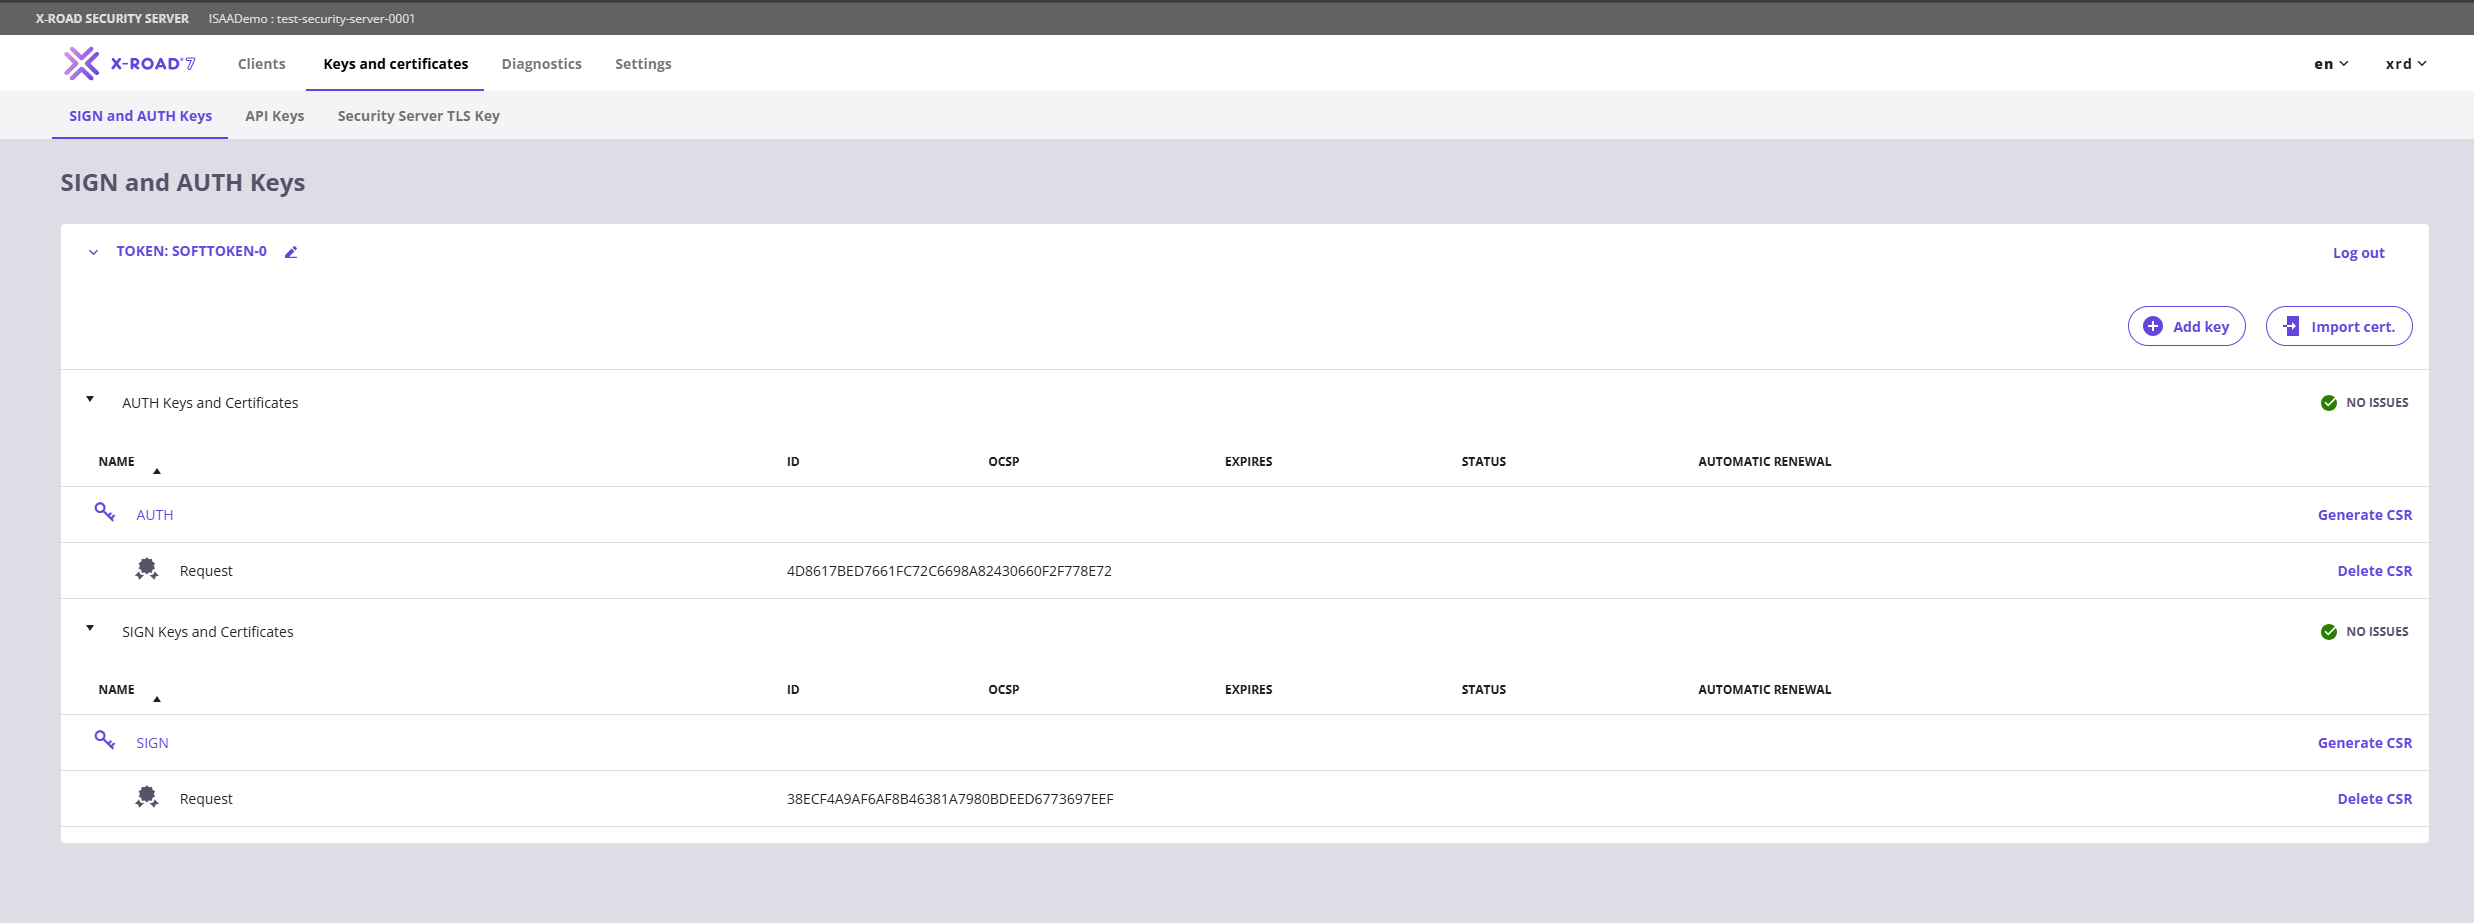
Այս քայլերից հետո «SIGN and AUTH» էջում կցուցադրվի հետևյալ կարգավիճակը։ Ստեղծված CSR-ներն արխիվացված թղթապանակով ուղարկեք x-road@isaa.am էլ․ հասցեին (նույն էլեկտրոնային նամակով, որով ուղարկել եք configuration anchor-ի հարցումը)՝ տորագրված սերտիֆիկատները ստանալու համար։
Ավելացնել նույնականացման բանալի (Authentication key)
«Keys and Certificates» էջի «softToken-0» բաժնում սեղմեք «Add Key»։ Բացված էջում մուտքագրեք key label-ը (SIGN or AUTH) և սեղմեք «Continue»։
Սահմանեք «Usage» բանալին «AUTHENTICATION», իսկ «Certification Service»-ը՝ «Test CA»:

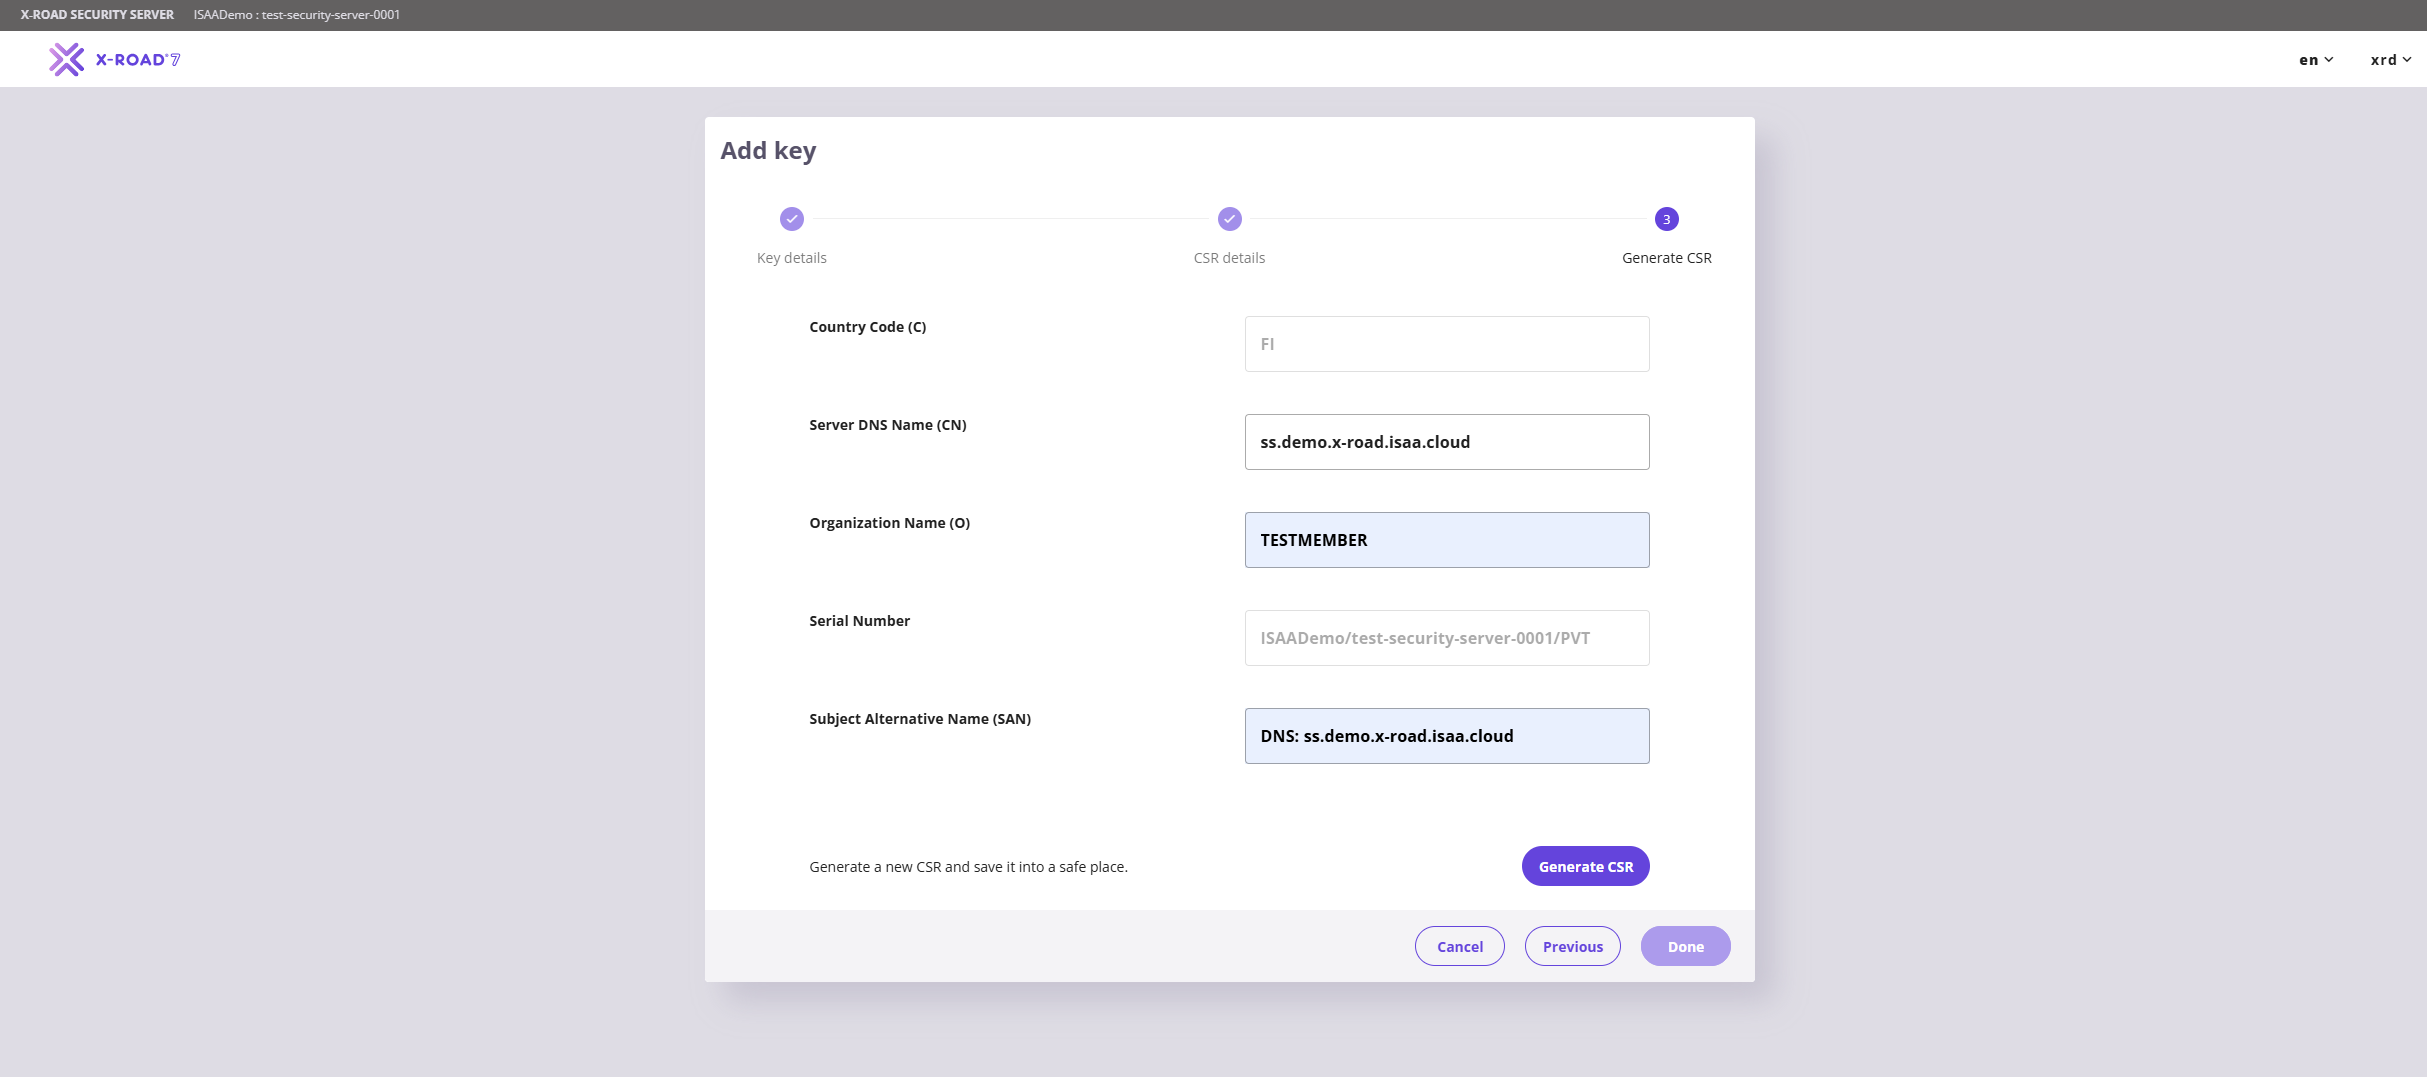
Սահմանեք «Organization Name (O)»-ում այն նույն արժեքը, որը սահմանված է «Member Code»-ում, իսկ «Server DNS Name (CN)»-ում՝ սերվերի DNS անվանումը կամ IP հասցեն։ «Subject Alternative Name (SAN)» -ի համար լրացրեք հետևյալ տարբերակներից մեկը՝
- DNS:
security-server.dns-name.am - IP:
ip-address-of-the-server
Ձեր օգտագործած IP հասցեն կամ DNS անվանումը պետք է ապահովի անվտանգության սերվերի հանրային պորտերի (5500 և 5577) հասանելիությունը։
Սեղմեք «Generate CSR», այնուհետև՝ «Done»։
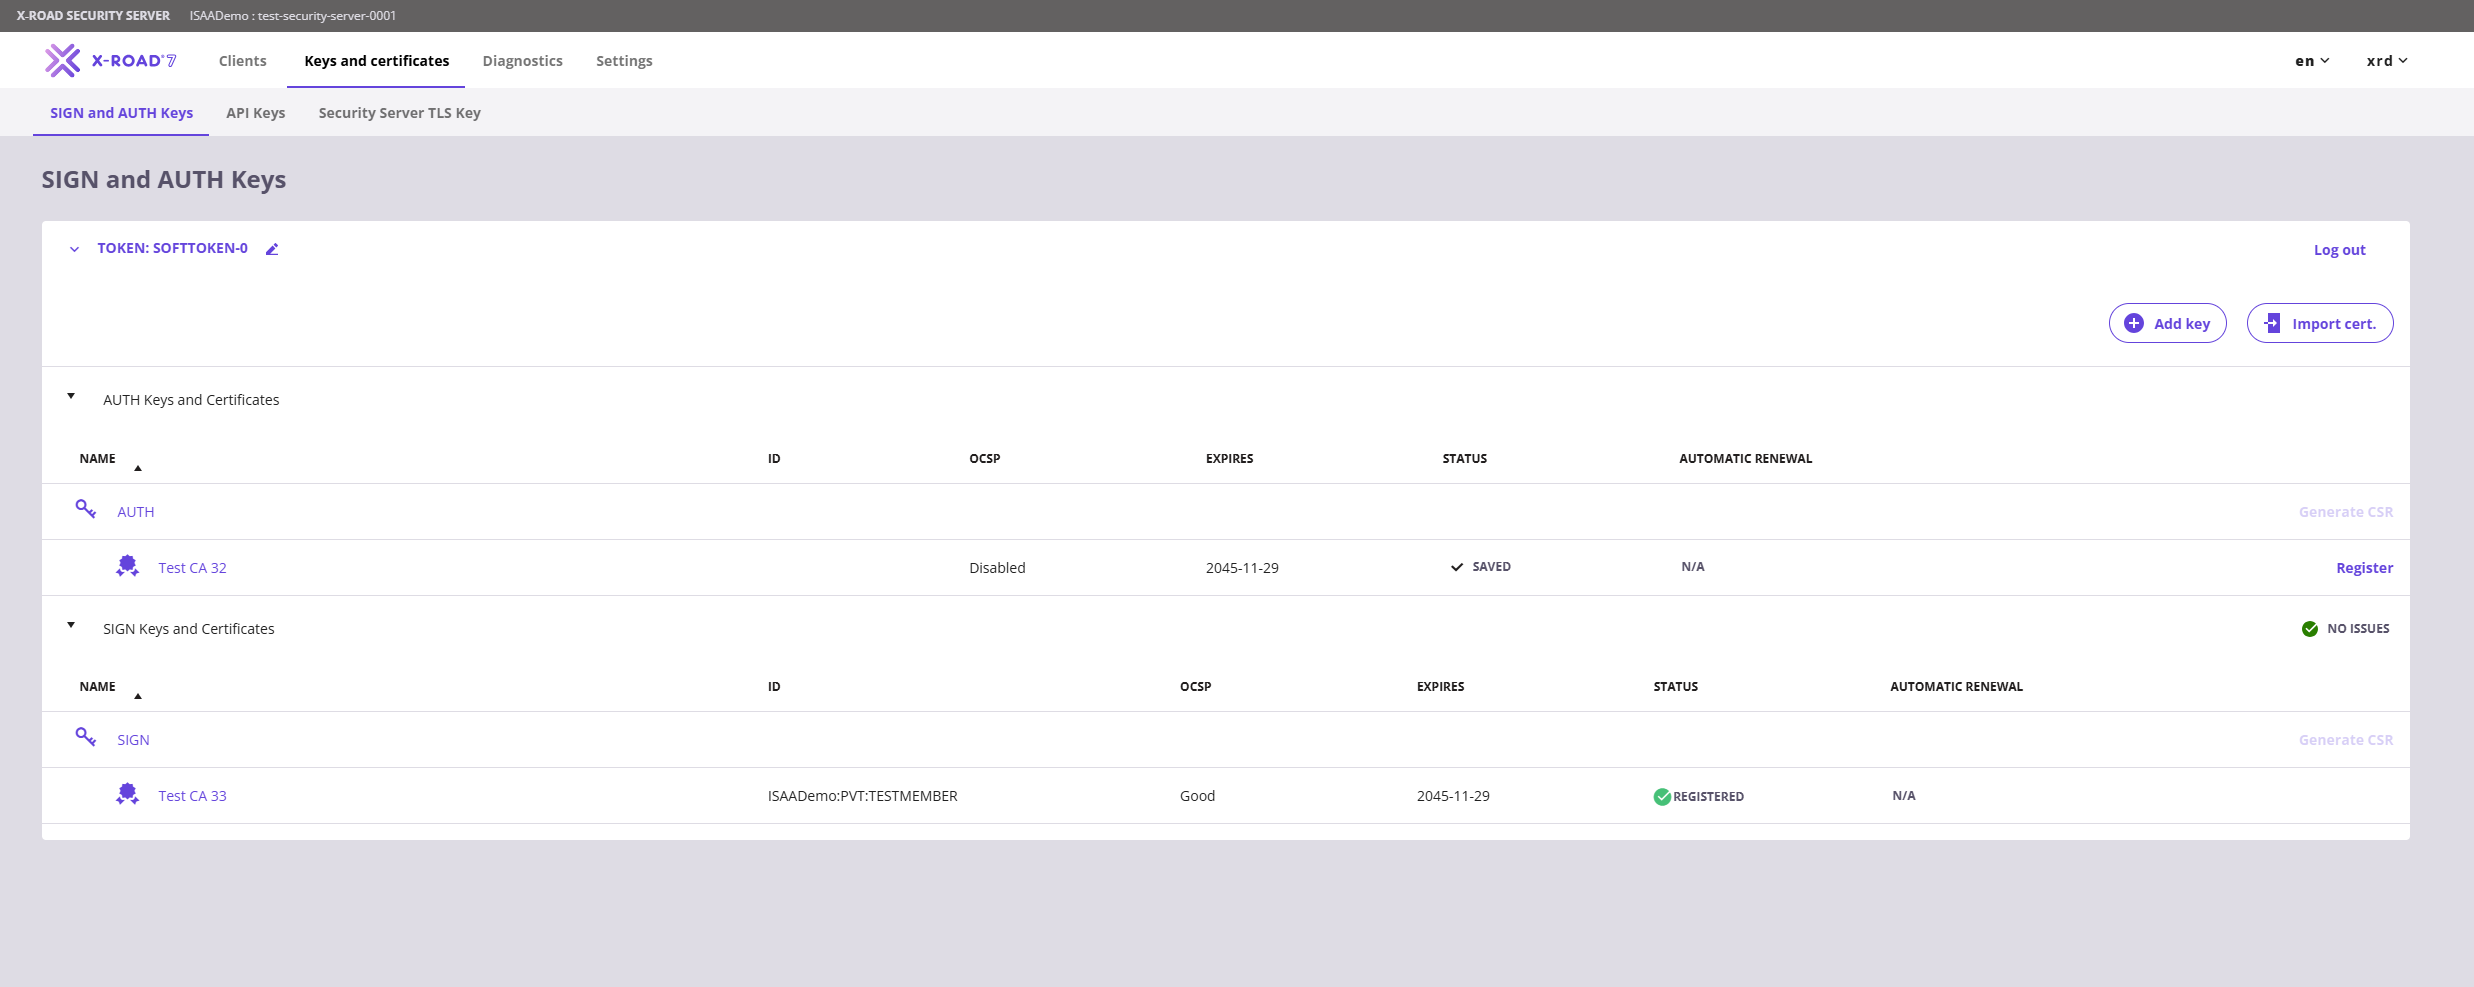
Այս քայլերից հետո «SIGN and AUTH» էջում կցուցադրվի հետևյալ կարգավիճակը։ Ստեղծված CSR-ներն արխիվացված թղթապանակով ուղարկեք x-road@isaa.am էլ․ հասցեին (նույն էլեկտրոնային նամակով, որով ուղարկել եք configuration anchor-ի հարցումը)՝ ստորագրված սերտիֆիկատները ստանալու համար։
Սերտիֆիկատների ներմուծում և գրանցում
ՀՏՀԳ-ից ստորագրված սերտիֆիկատները ստանալուց հետո անցեք «Keys and Certificates» էջ և սեղմեք «Import Cert»՝ երկու սերտիֆիկատները (առանձին) ներմուծելու համար։
Ներմուծումից հետո սերտիֆիկատների էջը կունենա հետևյալ կարգավիճակը։
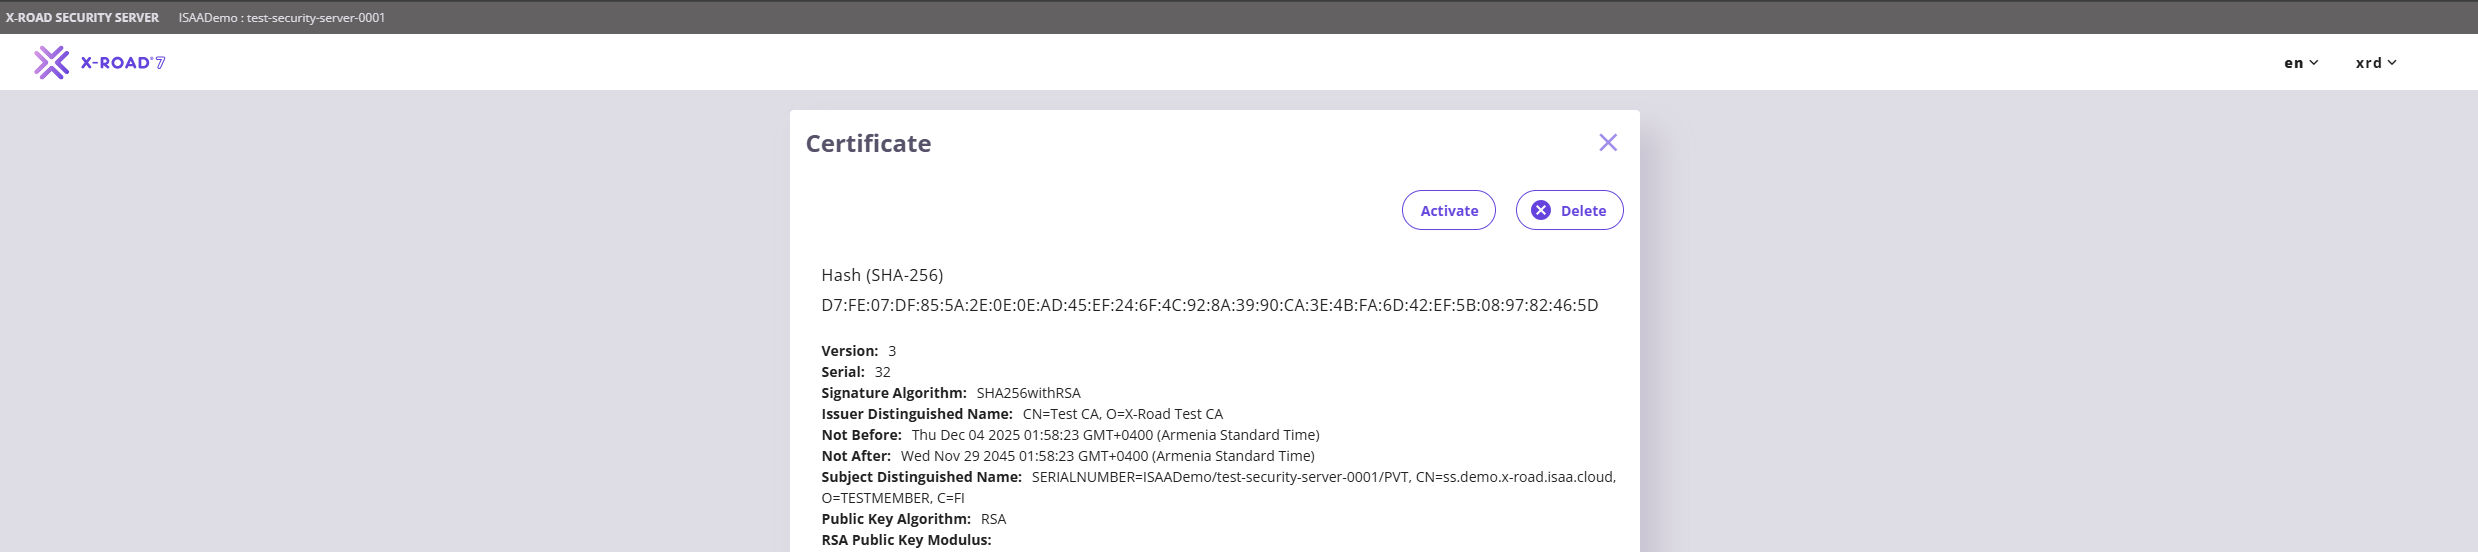
Սերտիֆիկատի կարգավորումն ավարտելու համար անհրաժեշտ է բացել նույնականացման սերտիֆիկատը (authentication certificate) և բացված էջում սեղմել «Activate»։
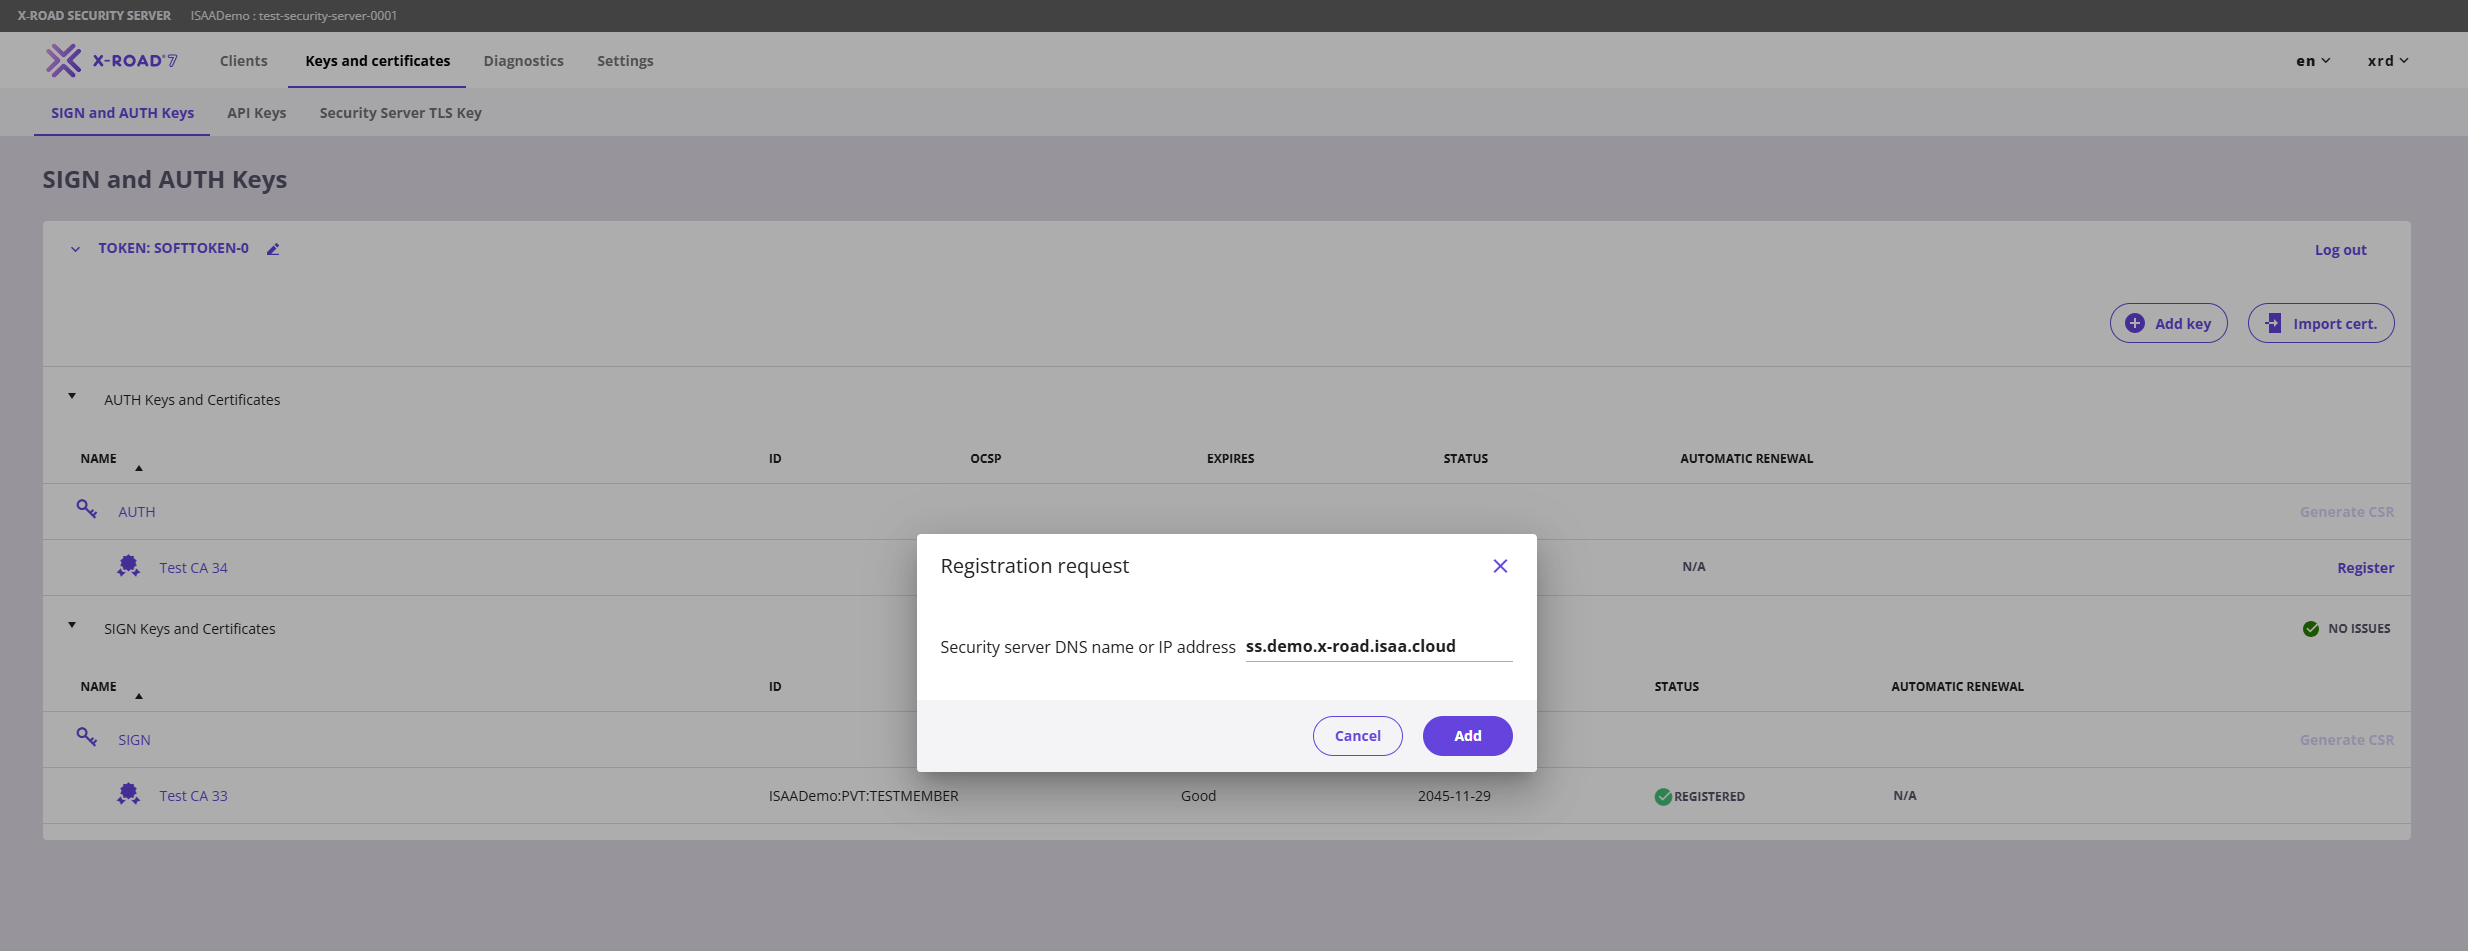
Ակտիվացնելուց հետո վերադարձեք և սեղմեք նույնականացման սերտիֆիկատի (authentication certificate) ձախ կողմում գտնվող «Register» կոճակը։ Բացված պատուհանում մուտքագրեք DNS անվանումը կամ IP հասցեն և սեղմեք «Add»։
Սերտիֆիկատի կարգավիճակը «Saved»-ից կփոխվի «Registration in progress»։
Սերտիֆիկատի և անդամի գրանցման հարցումները Կենտրոնական սերվերում (Central Server) հաստատվում են ձեռքով։ Եթե գրանցման գործընթացը երկար է տևում, կապ հաստատեք ՀՏՀԳ-ի հետ՝ x-road@isaa.am էլ․հասցեով։
Առաջին ենթահամակարգը
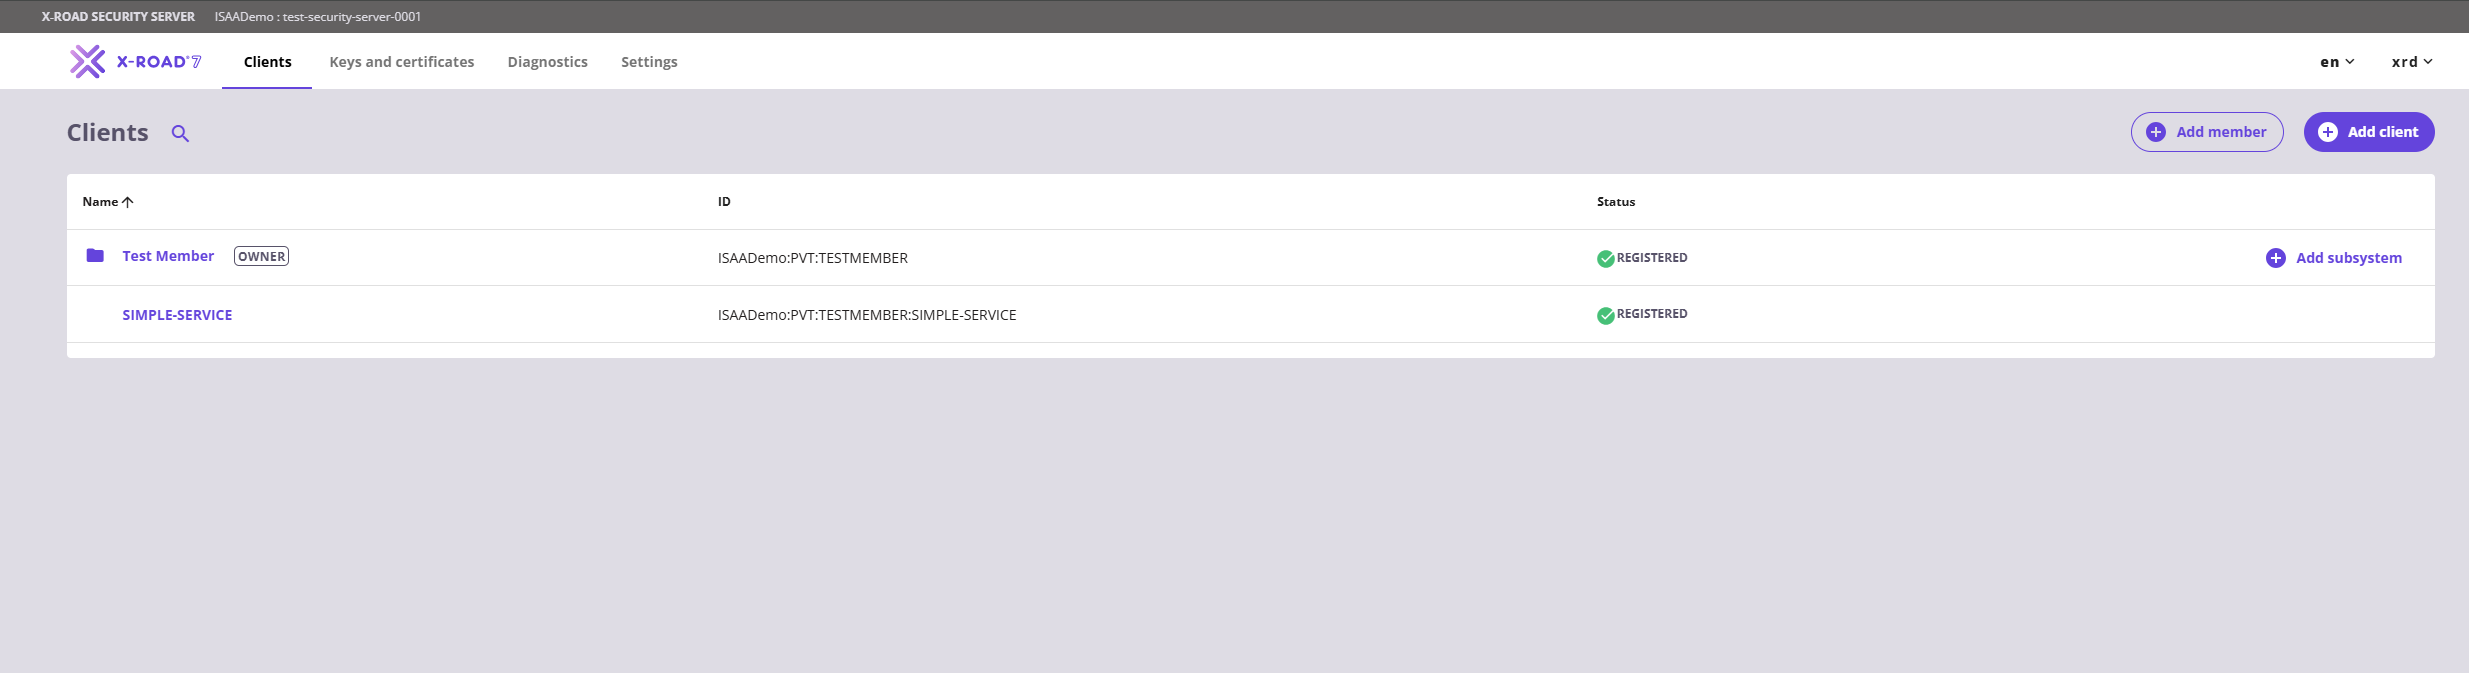
Նույնականացման սերտիֆիկատի (Authentication certificate) գրանցումից հետո, անհրաժեշտ է ստեղծել անվտանգության սերվերի առաջին ենթահամակարգը։ Մենյուից անցեք «Clients» էջ և սեղմեք «Add Subsystem» կոճակը։ Բացված էջում նշեք միայն ենթահամակարգի կոդը։ Կարող եք նշել ցանկացած կոդ՝ ըստ օգտագործման դեպքի (use case) (հասանելի ծառայության անուն կամ ենթահամակարգի նպատակը բնութագրող արժեք)։
Անհրաժեշտ է որպեսզի «Register Subsystem» նշավանդակը նշված լինի, որպեսզի ուղարկվի հաճախորդի գրանցման հարցումը։

Անդամի գրանցումը հաստատվելուց հետո ենթահամակարգը պատրաստ է օգտագործման։
Տեսանյութ-ուղեցույց
Ստորև ներկայացված է տեսանյութ, որը ներառում է այս ուղեցույցում նկարագրված քայլերը։