Important
For the production environment, a separate X-Road Security Server must be deployed on separate infrastructure (physical or virtual), with its own IP address and DNS name, different from those of the test environment.
Please do not use the test environment's Security Server, or its IP address or DNS name, for production. The Security Servers of the test and production environments, and their corresponding network identifiers, must be kept separate.
Alongside the transition to the production environment, the test infrastructure must be maintained and continue to operate for testing purposes.
X-Road Security Server Configuration Guide
Introduction
At this point, we should have a Security Server deployment that still needs to be joined to the X-Road network and the configuration anchor of the Central Server.
The next steps are:
- Upload the anchor to the Security Server and perform the initial configuration.
- Unlock the soft tokens and add the timestamping service.
- Generate the CSRs for the auth and sign certificates.
- Upload the certificates, activate them, and register the authentication certificate.
- Create the first subsystem and send the registration request.
Test vs production
The screenshots in this guide were taken in the test environment (ISAADemo). The steps are the same in production (AM), but you select the production services (TSA and ADEL CA) instead of Test TSA and Test CA. See Test vs Production differences.
Initial Configuration
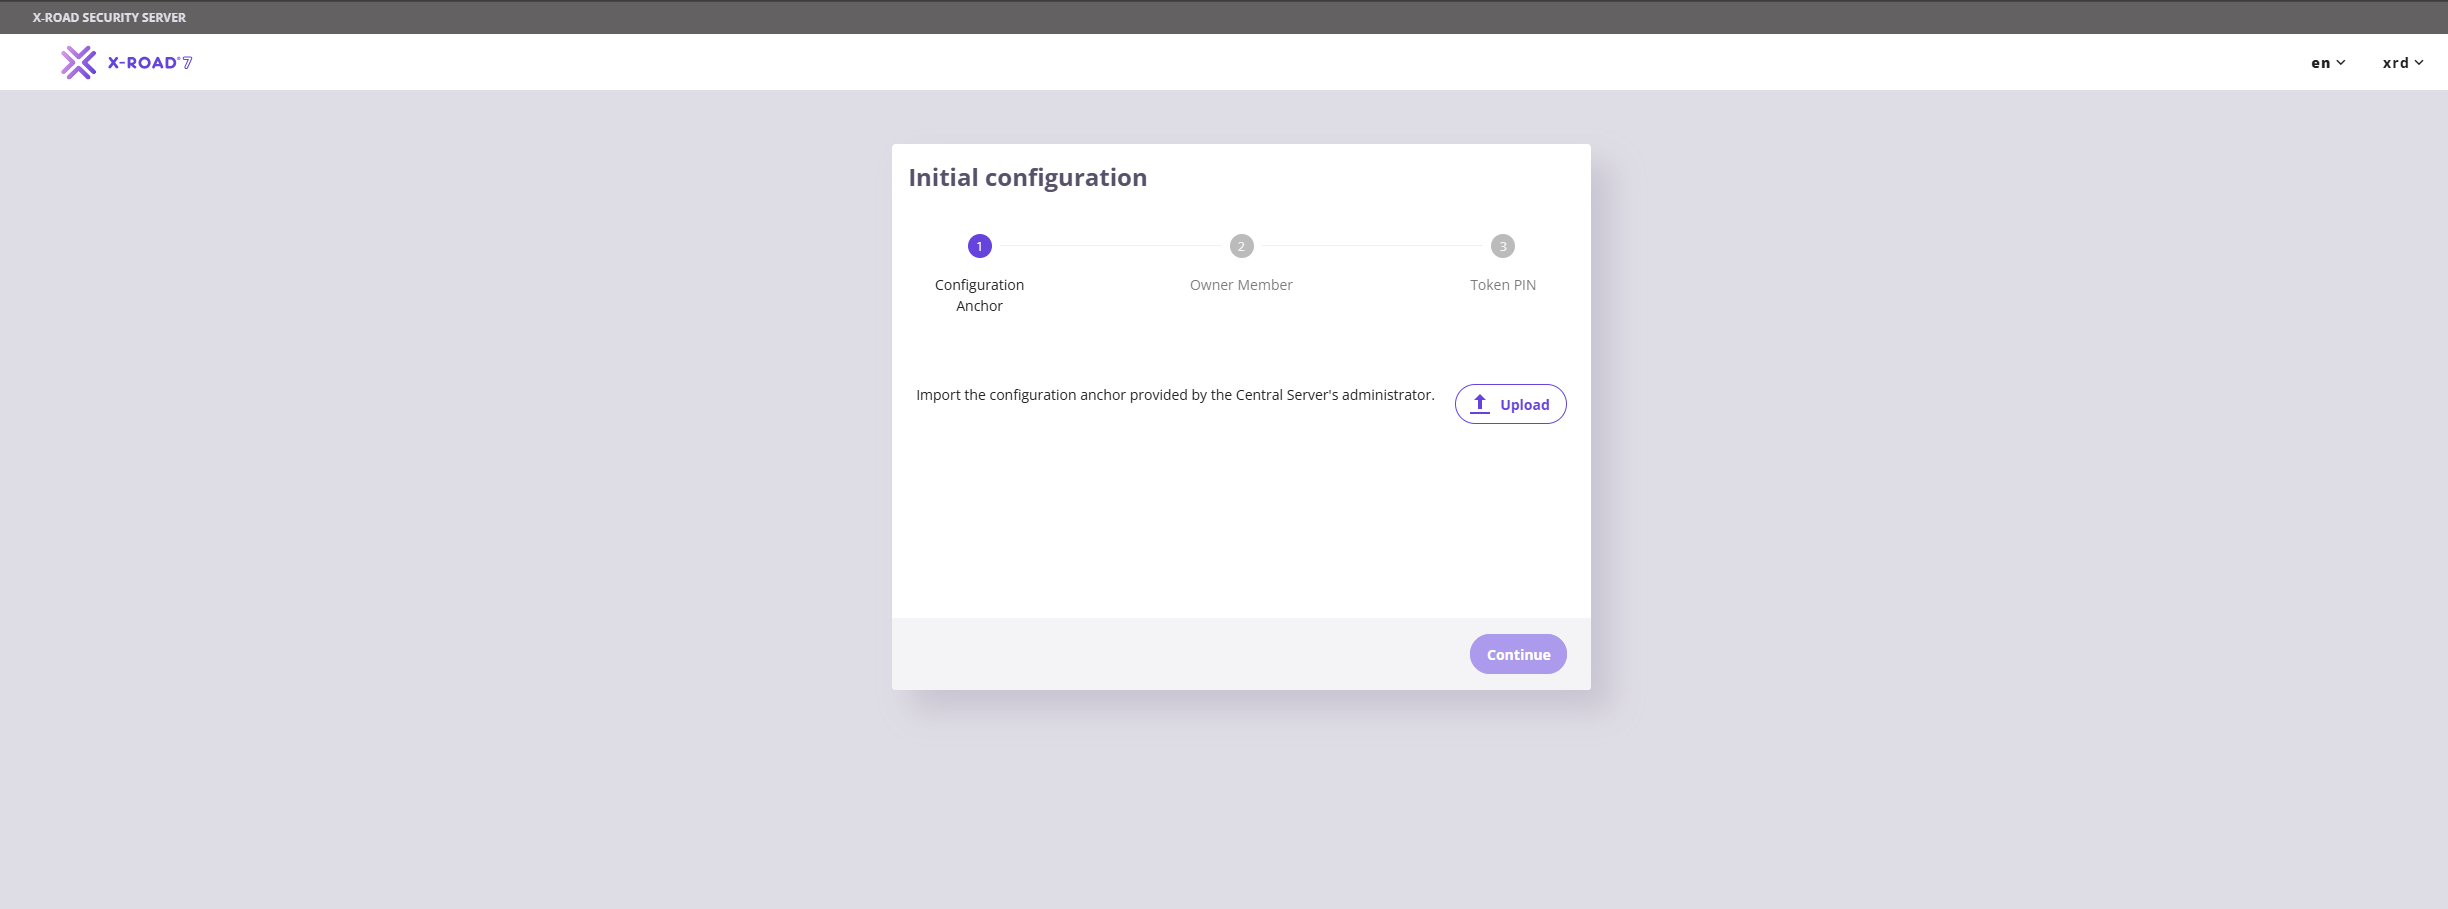
Right after the deployment, go to the Admin UI on port 4000. It will open the initial configuration screen shown in the picture below. Upload the configuration anchor received from ADEL and press Continue.
On the next page, choose the Member Class, Member Code, and set the Security Server Code provided with the configuration anchor.
To ensure a standardized ecosystem, please follow the naming conventions below.
- Member Class: choose the value that corresponds to the type of your organization (
GOV,MUN,PUB,NGOorPVT). - Member Code: use the legal entity's unique identification code (Իրավաբանական անձի նույնականացման ծածկագիր - ՁԿԴ).
- Security Server Code: use your legal entity identification code followed by the
-SSsuffix, e.g.12345678-SS. If your organization operates several Security Servers, add a sequence number to the suffix, e.g.12345678-SS1,12345678-SS2.
Member Name
The Member Name is registered by ADEL together with your Member Code, so it must be provided when you request the configuration anchor (see Joining ADEL). Use your official English name as registered in the Legal Entities Registry. If the full name exceeds 50 characters, you may use official abbreviations.
Identifier Character Restrictions
X-Road identifiers' values (Member Code, Security Server Code, Subsystem Code) may contain only:
- Letters
A...Zanda...z - Numbers
0...9 - The hyphen
-
Spaces, underscores and other characters (e.g. _ : ; / \ %) are not allowed.
Below is an example of the values for the test member that we will set up for this guide.
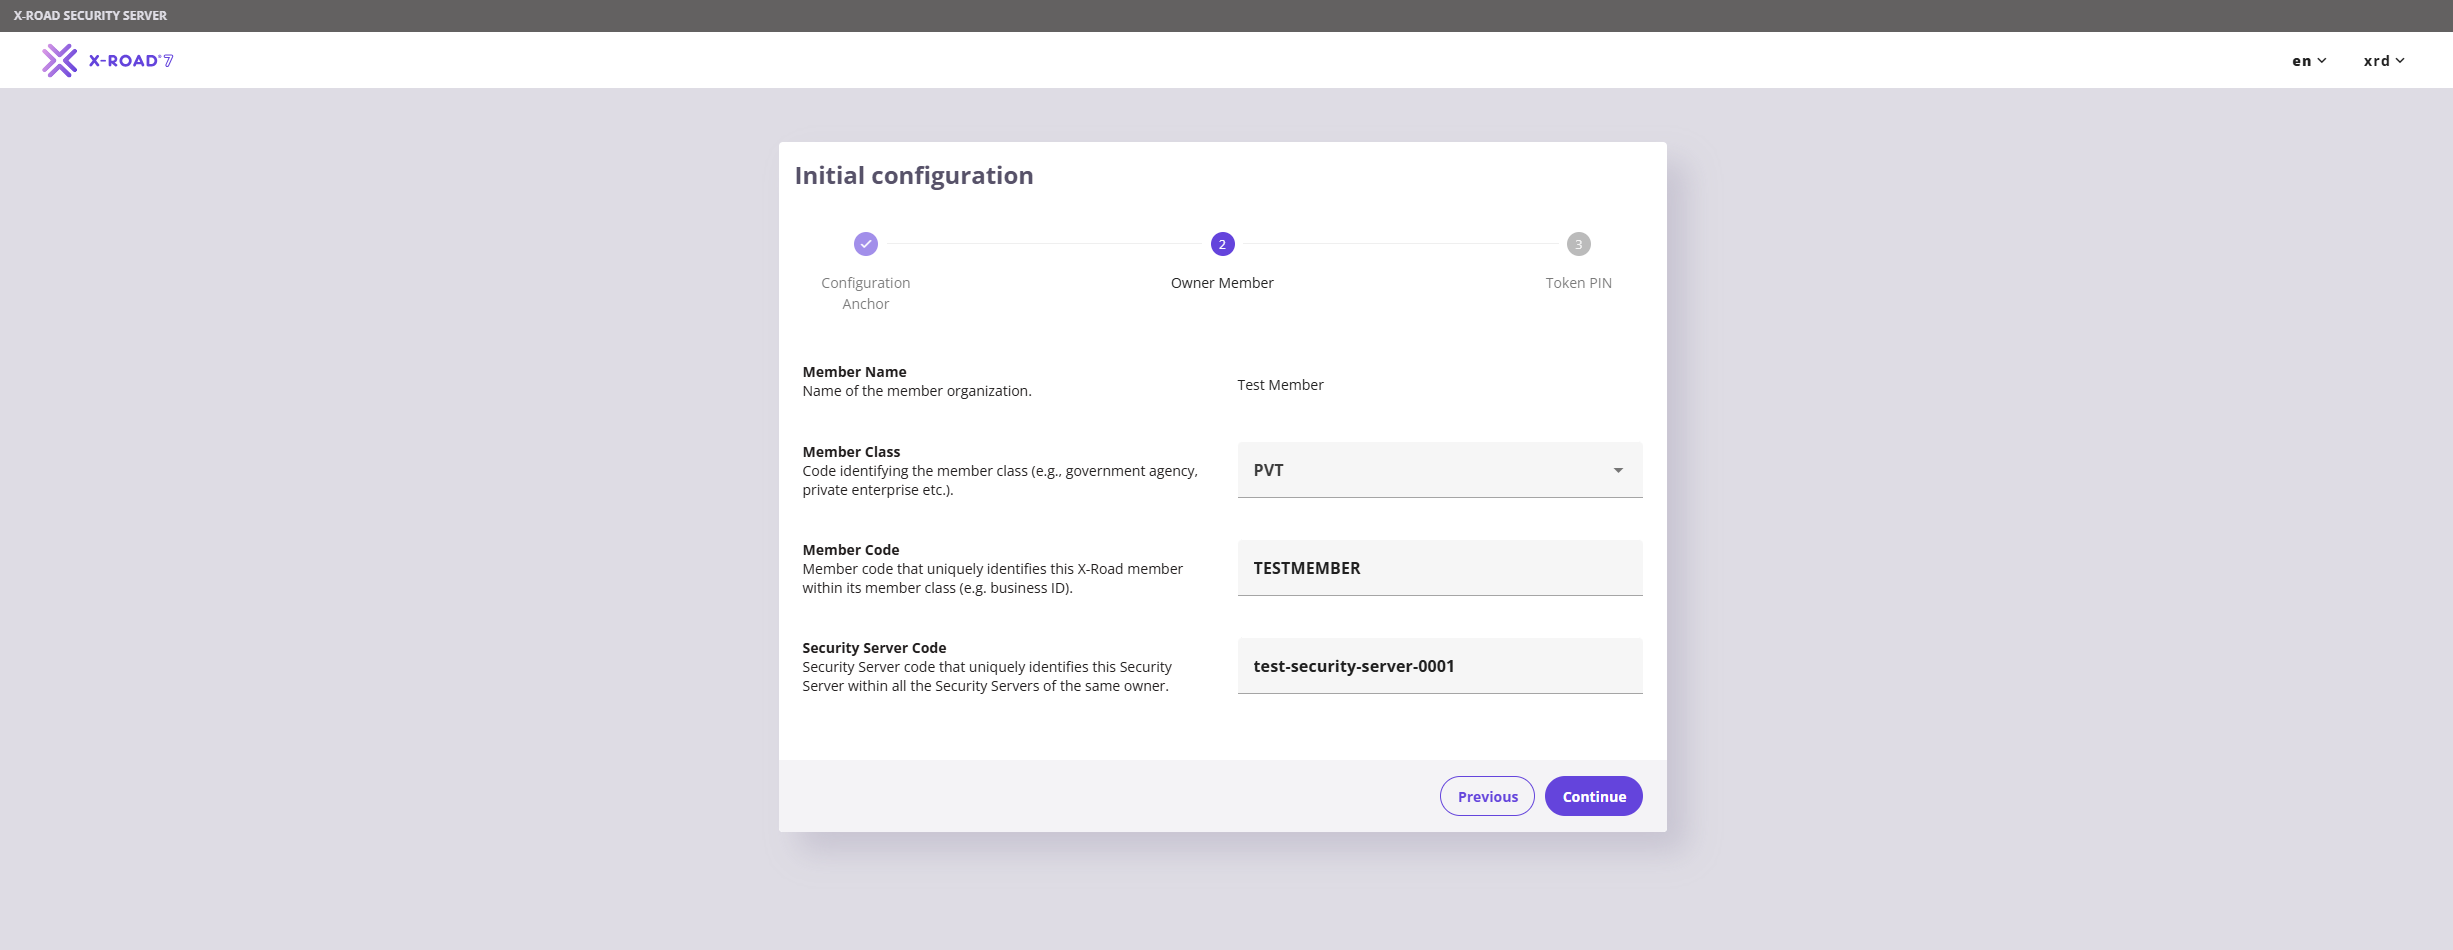
The final step here is setting a PIN for the Security Server. It must be at least 10 characters long and contain upper and lower case letters, symbols, and numbers.

Auth and Sign Certificates
When the initial configuration is done, go to the Settings page from the top menu and add the timestamping service. Select the one for your environment: Test TSA in the test environment (ISAADemo) or TSA in production (AM).

Then go to the Keys and Certificates page and unlock the soft token store by pressing the Log In button and entering the PIN. Once it is unlocked, we need to add two certificates: one for signing and one for authentication.

Adding Signing key
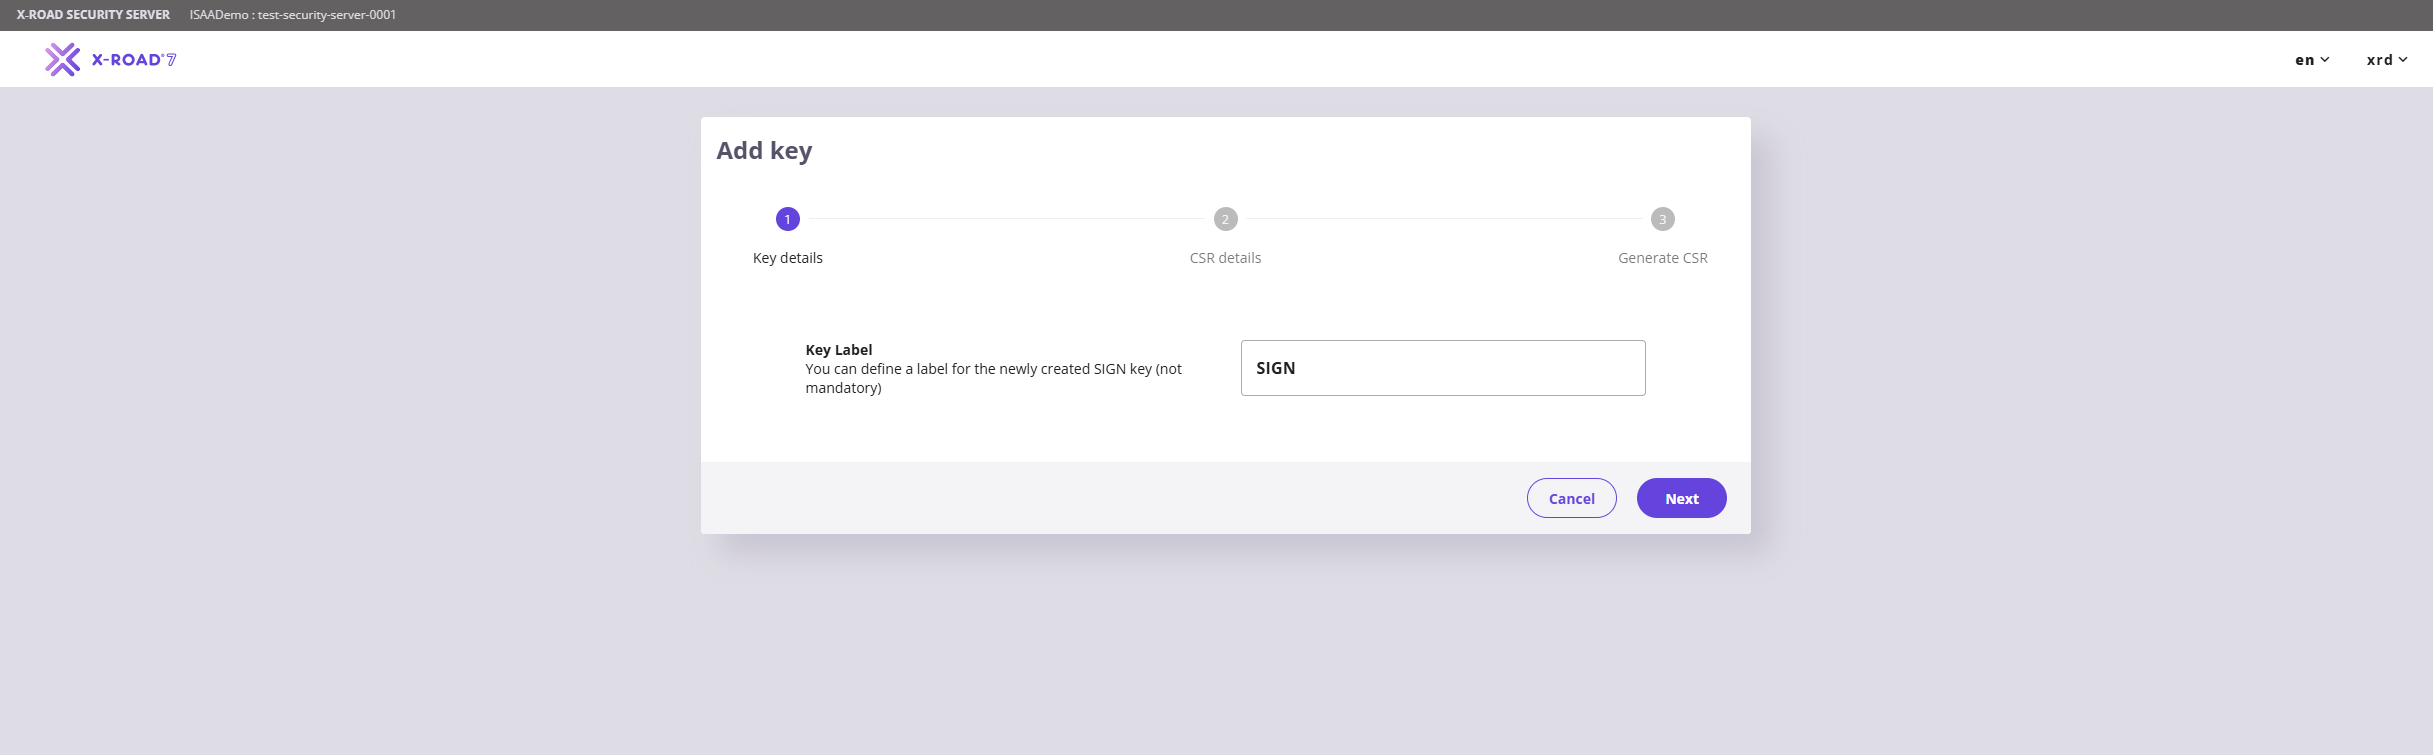
On the Keys and Certificates page, under softToken-0, click the Add Key button. On the page that opens, enter the key label (usually SIGN or AUTH) and press Continue.
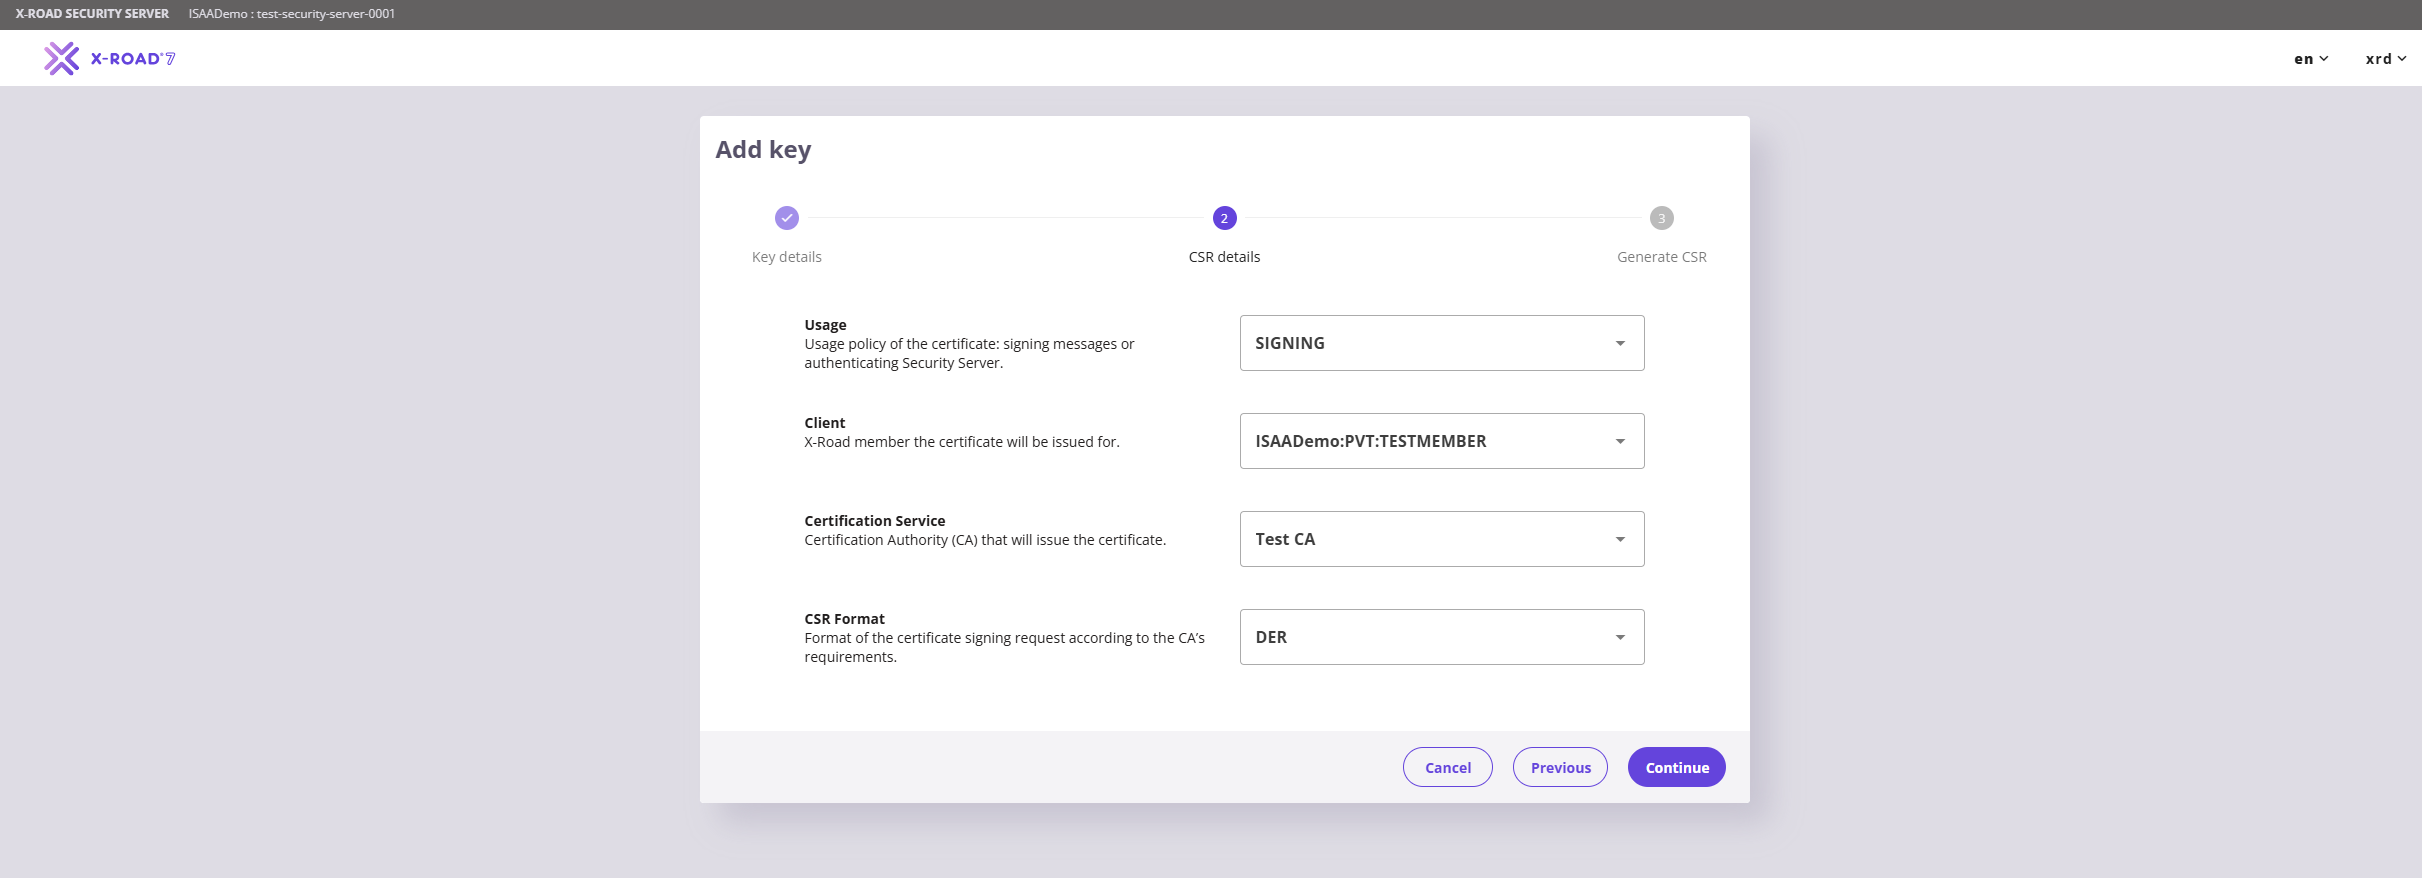
On the next page, set the key Usage to SIGNING, select the only available Client (the member entity), and set the Certification Service to the one for your environment: Test CA (test) or ADEL CA (production).
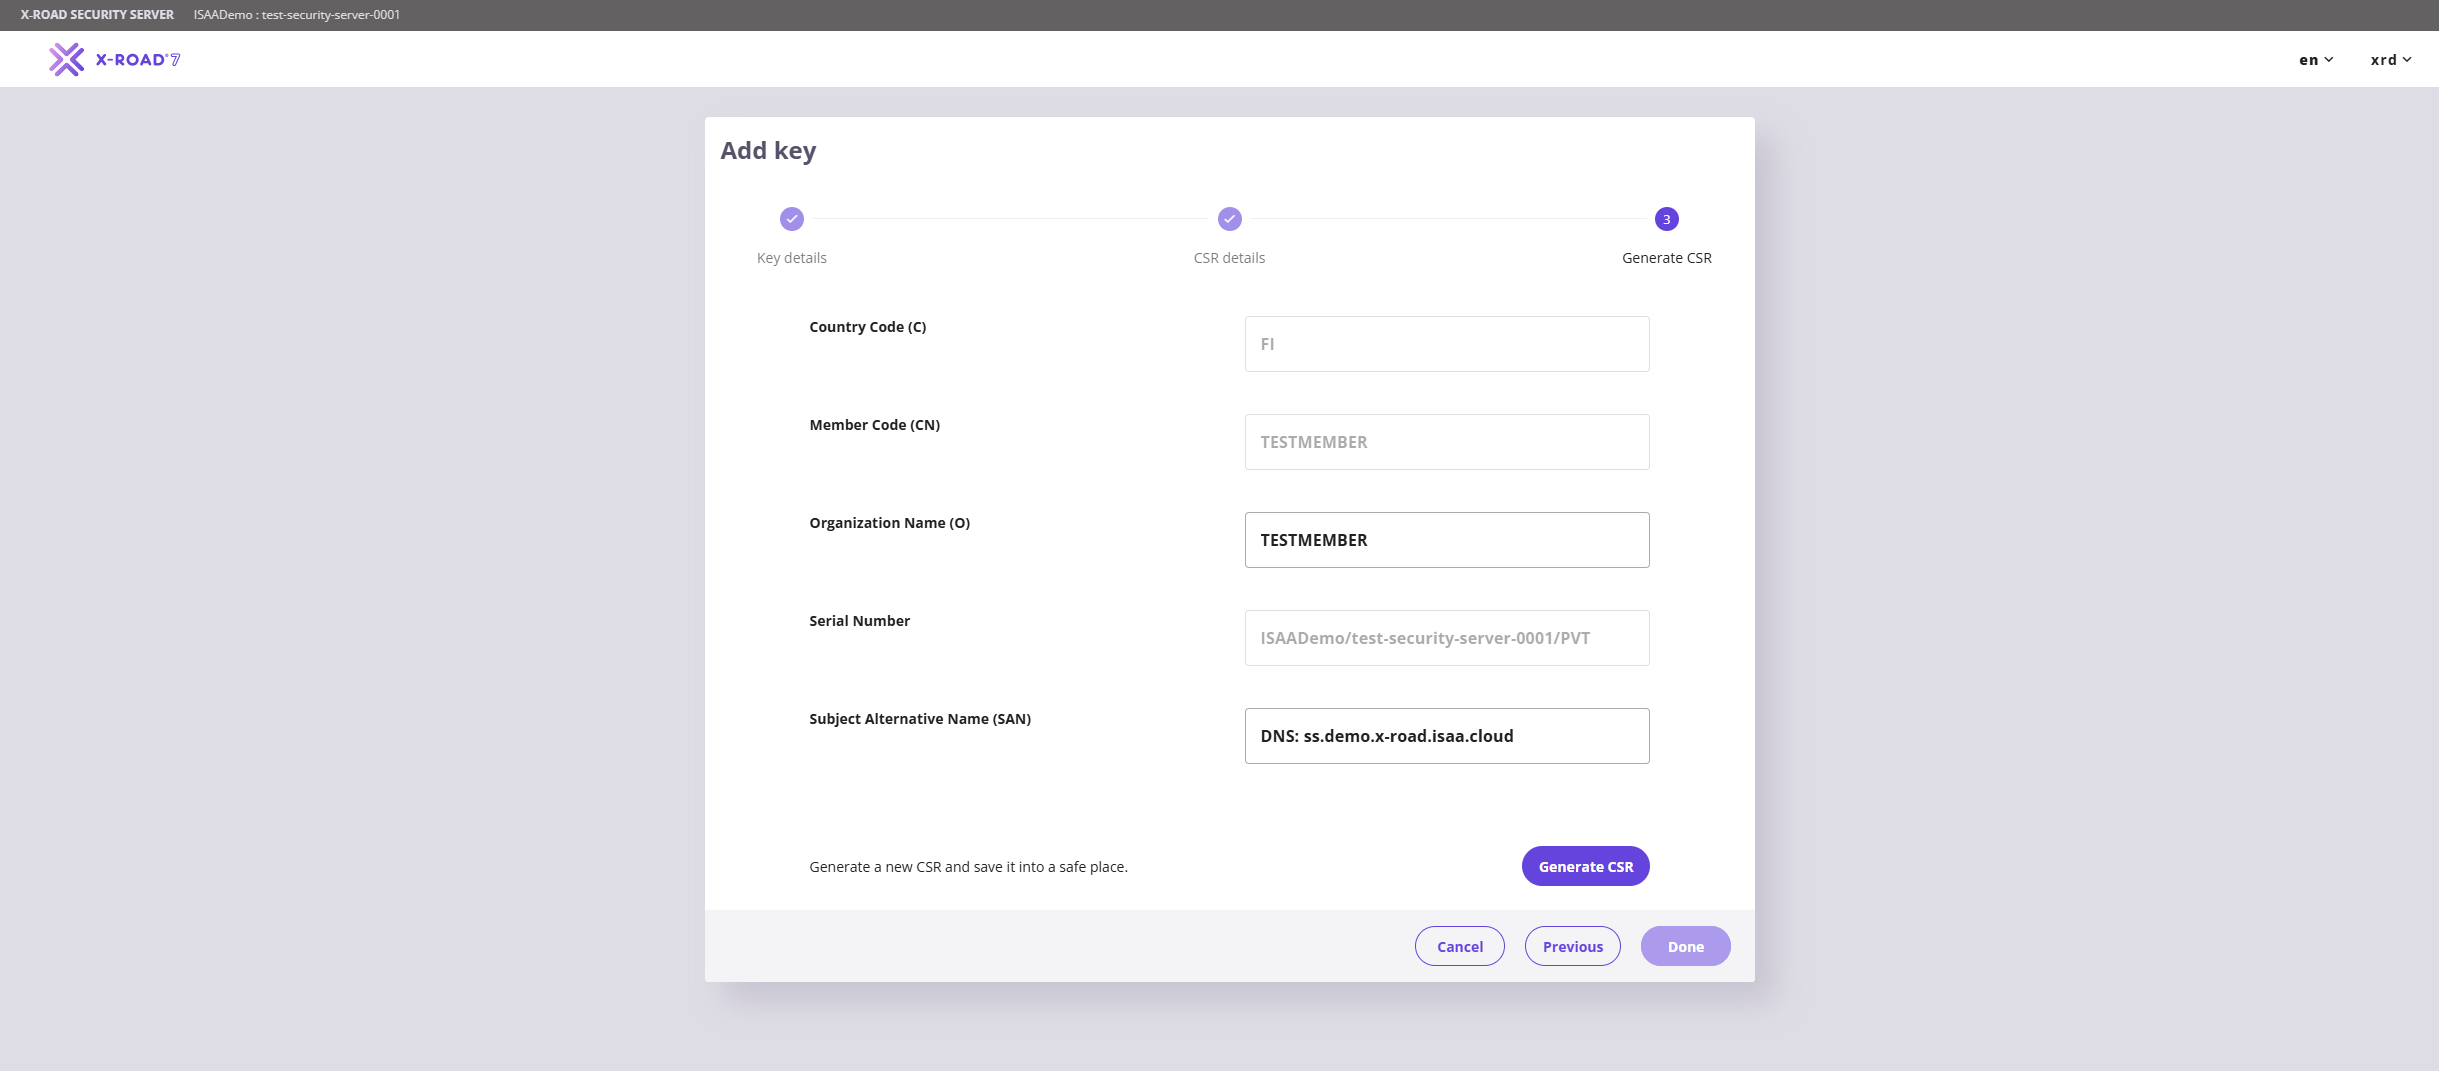
On the last form, set Organization Name (O) to the same value as the Member Name (the official English name of your organization). For Subject Alternative Name (SAN), choose one of the following options:
- DNS:
security-server.dns-name.am - IP:
ip-address-of-the-server
The IP or DNS name you use must expose the public ports of the Security Server (5500 and 5577).
Once done press on Generate CSR button and Done.
Adding Authentication key
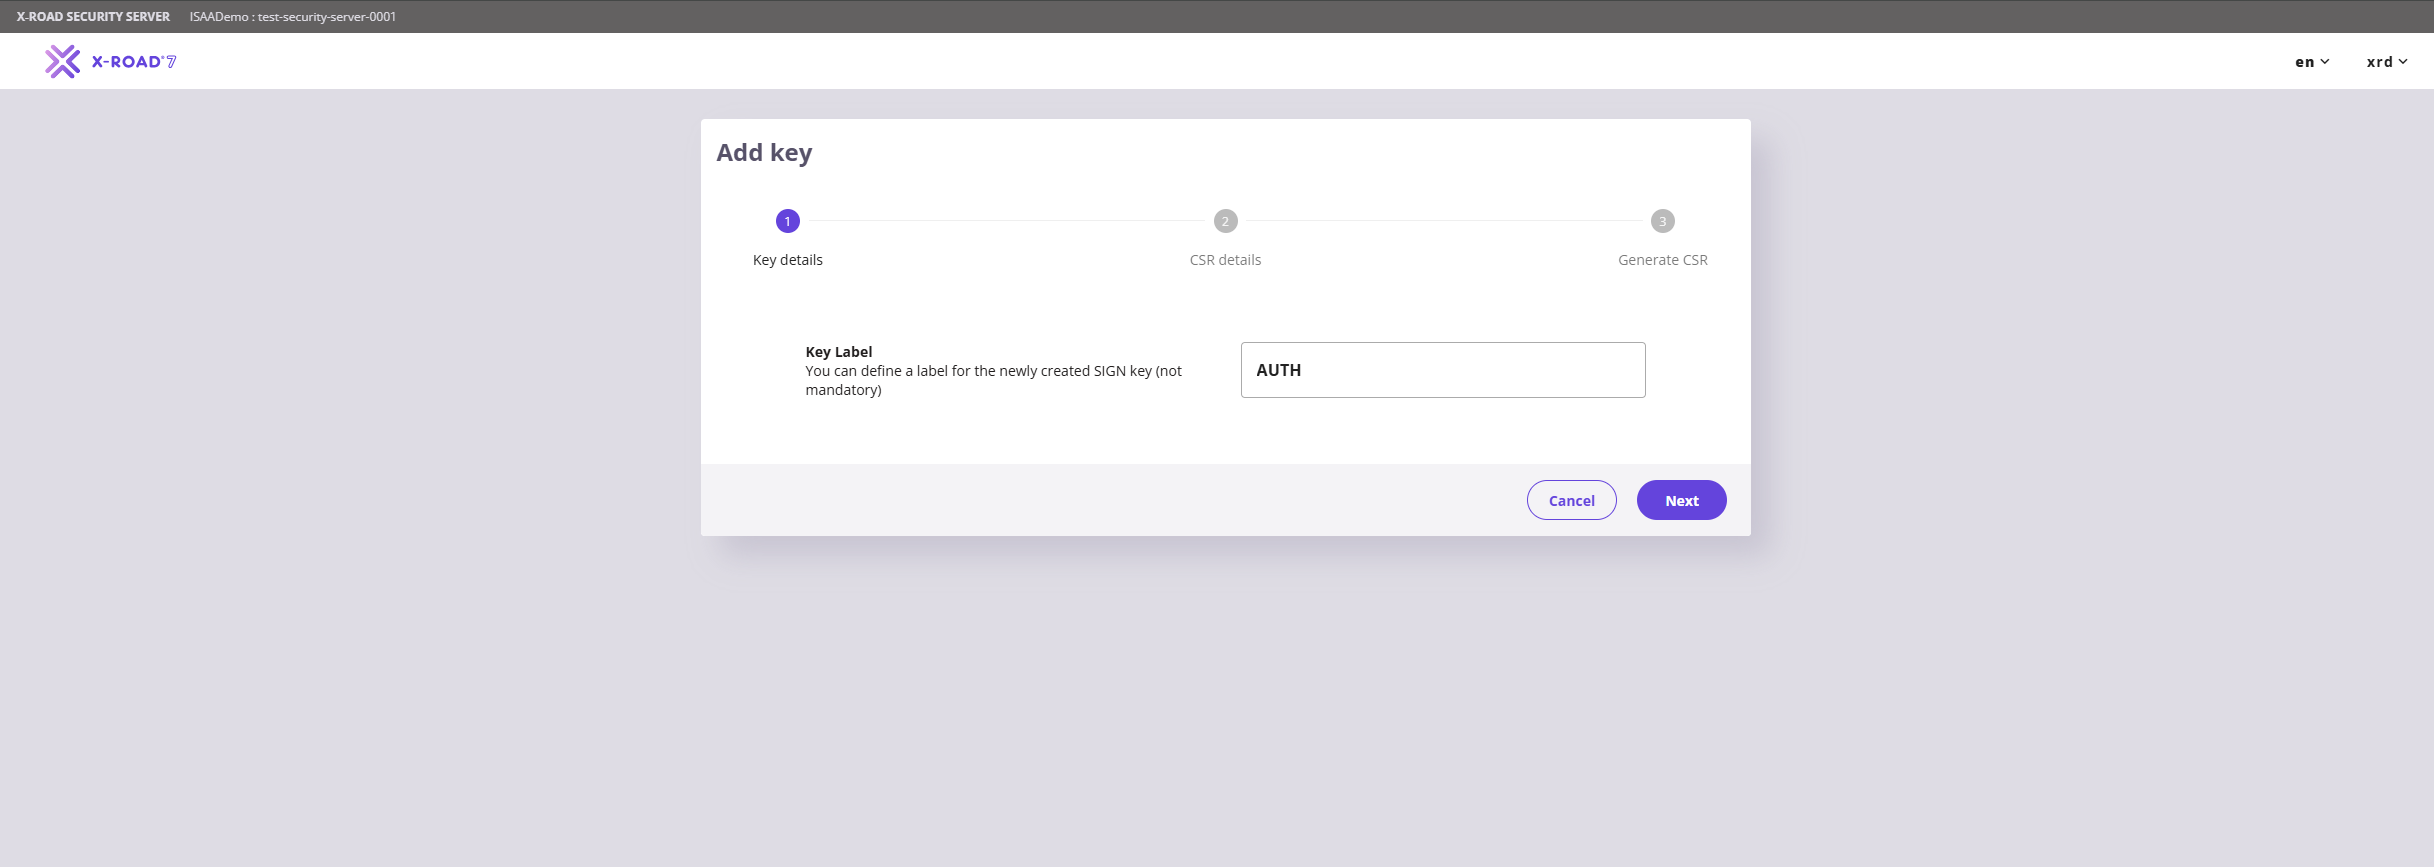
On the Keys and Certificates page, under softToken-0, click the Add Key button. On the page that opens, enter the key label (usually SIGN or AUTH) and press Continue.
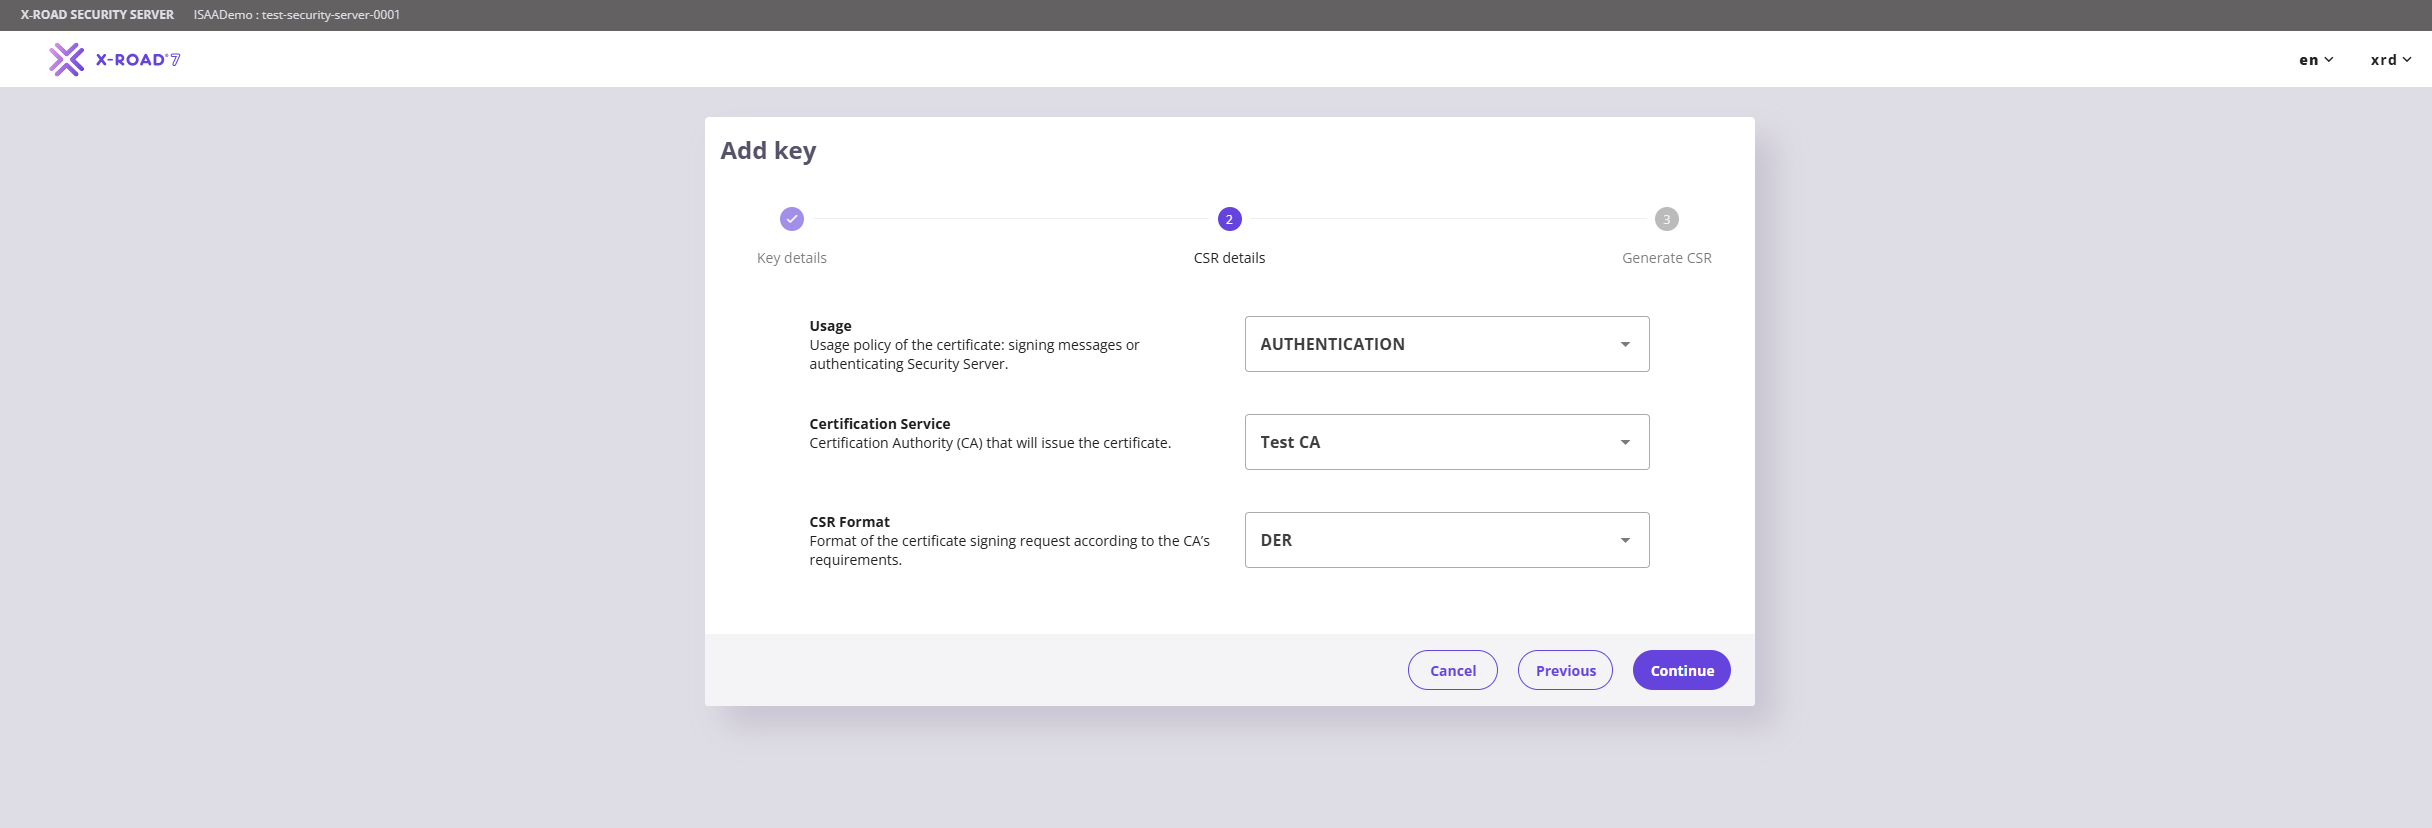
On the next page, set the key Usage to AUTHENTICATION, and set the Certification Service to the one for your environment: Test CA (test) or ADEL CA (production).
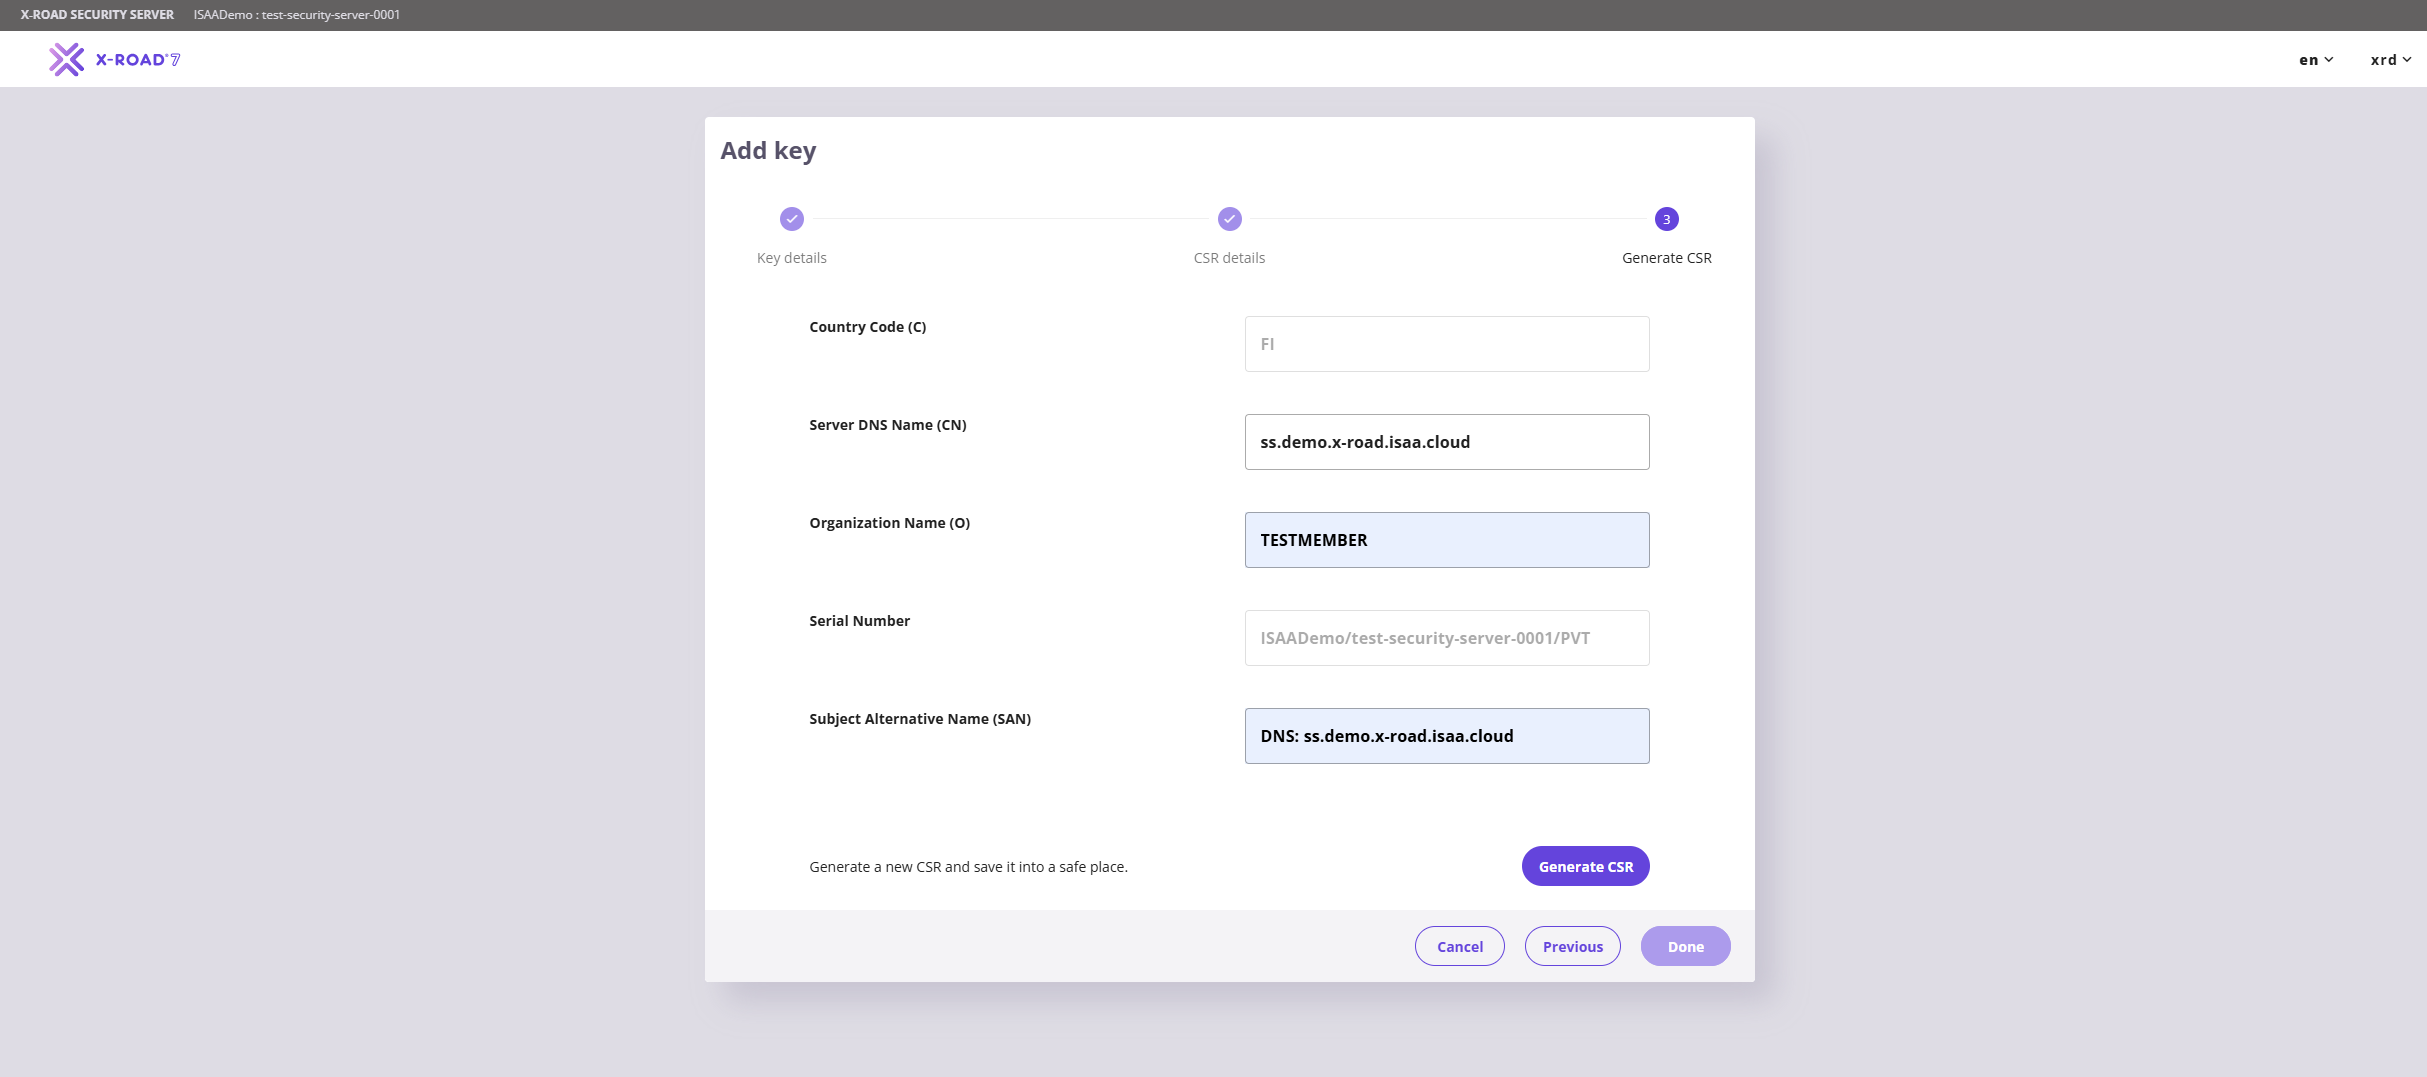
On the last form, set Organization Name (O) to the same value as the Member Name (the official English name of your organization), set Server DNS Name (CN) to the server’s DNS name or IP address, and set Subject Alternative Name (SAN) to one of the following options:
- DNS:
security-server.dns-name.am - IP:
ip-address-of-the-server
The IP or DNS name you use must expose the public ports of the Security Server (5500 and 5577).
Once done press on Generate CSR button and Done.
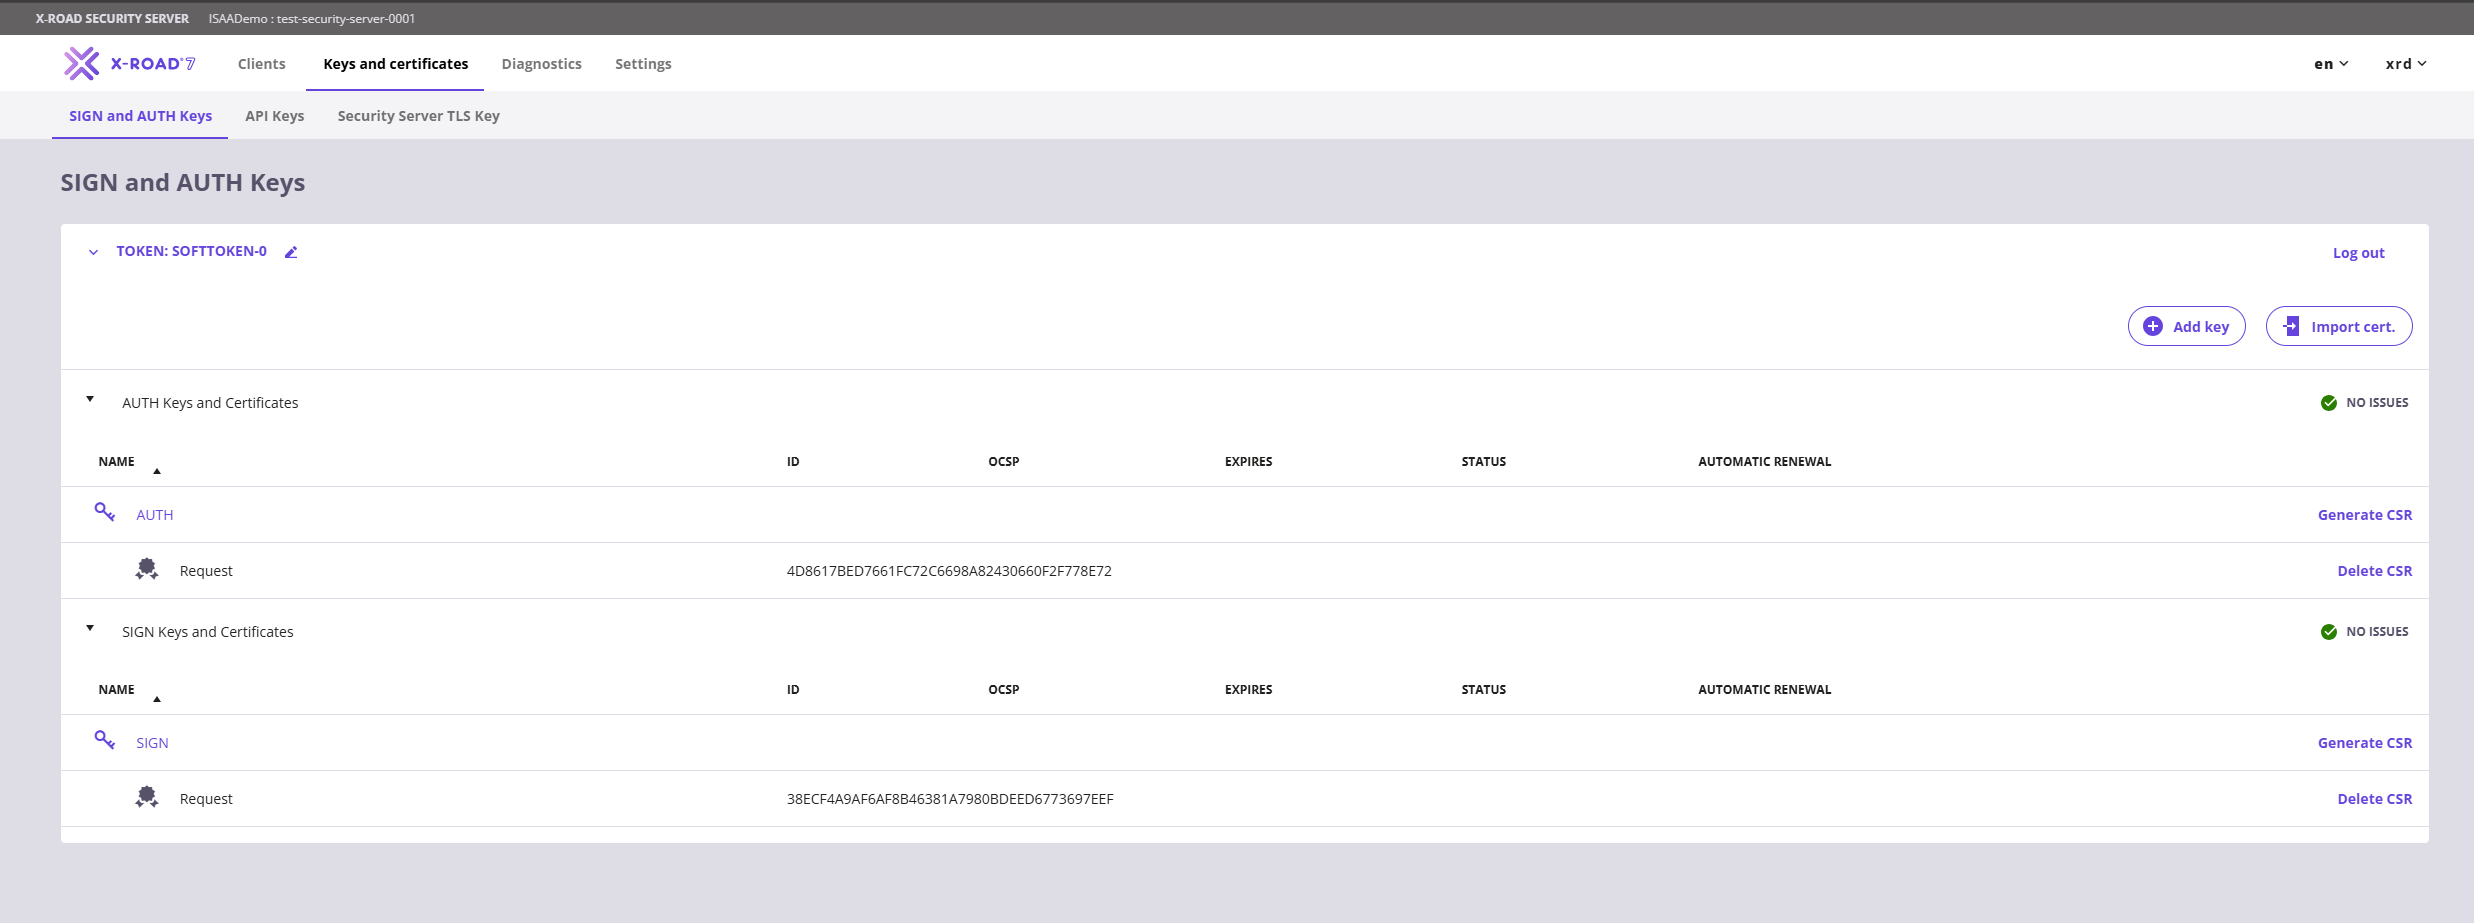
At the end of this process, you will see the following state on the SIGN and AUTH Keys page. To proceed, send the generated CSRs in an archived folder to adel@isaa.am (in the same email thread as the configuration anchor request) to receive the signed certificates.
Import and Registration of Certificates
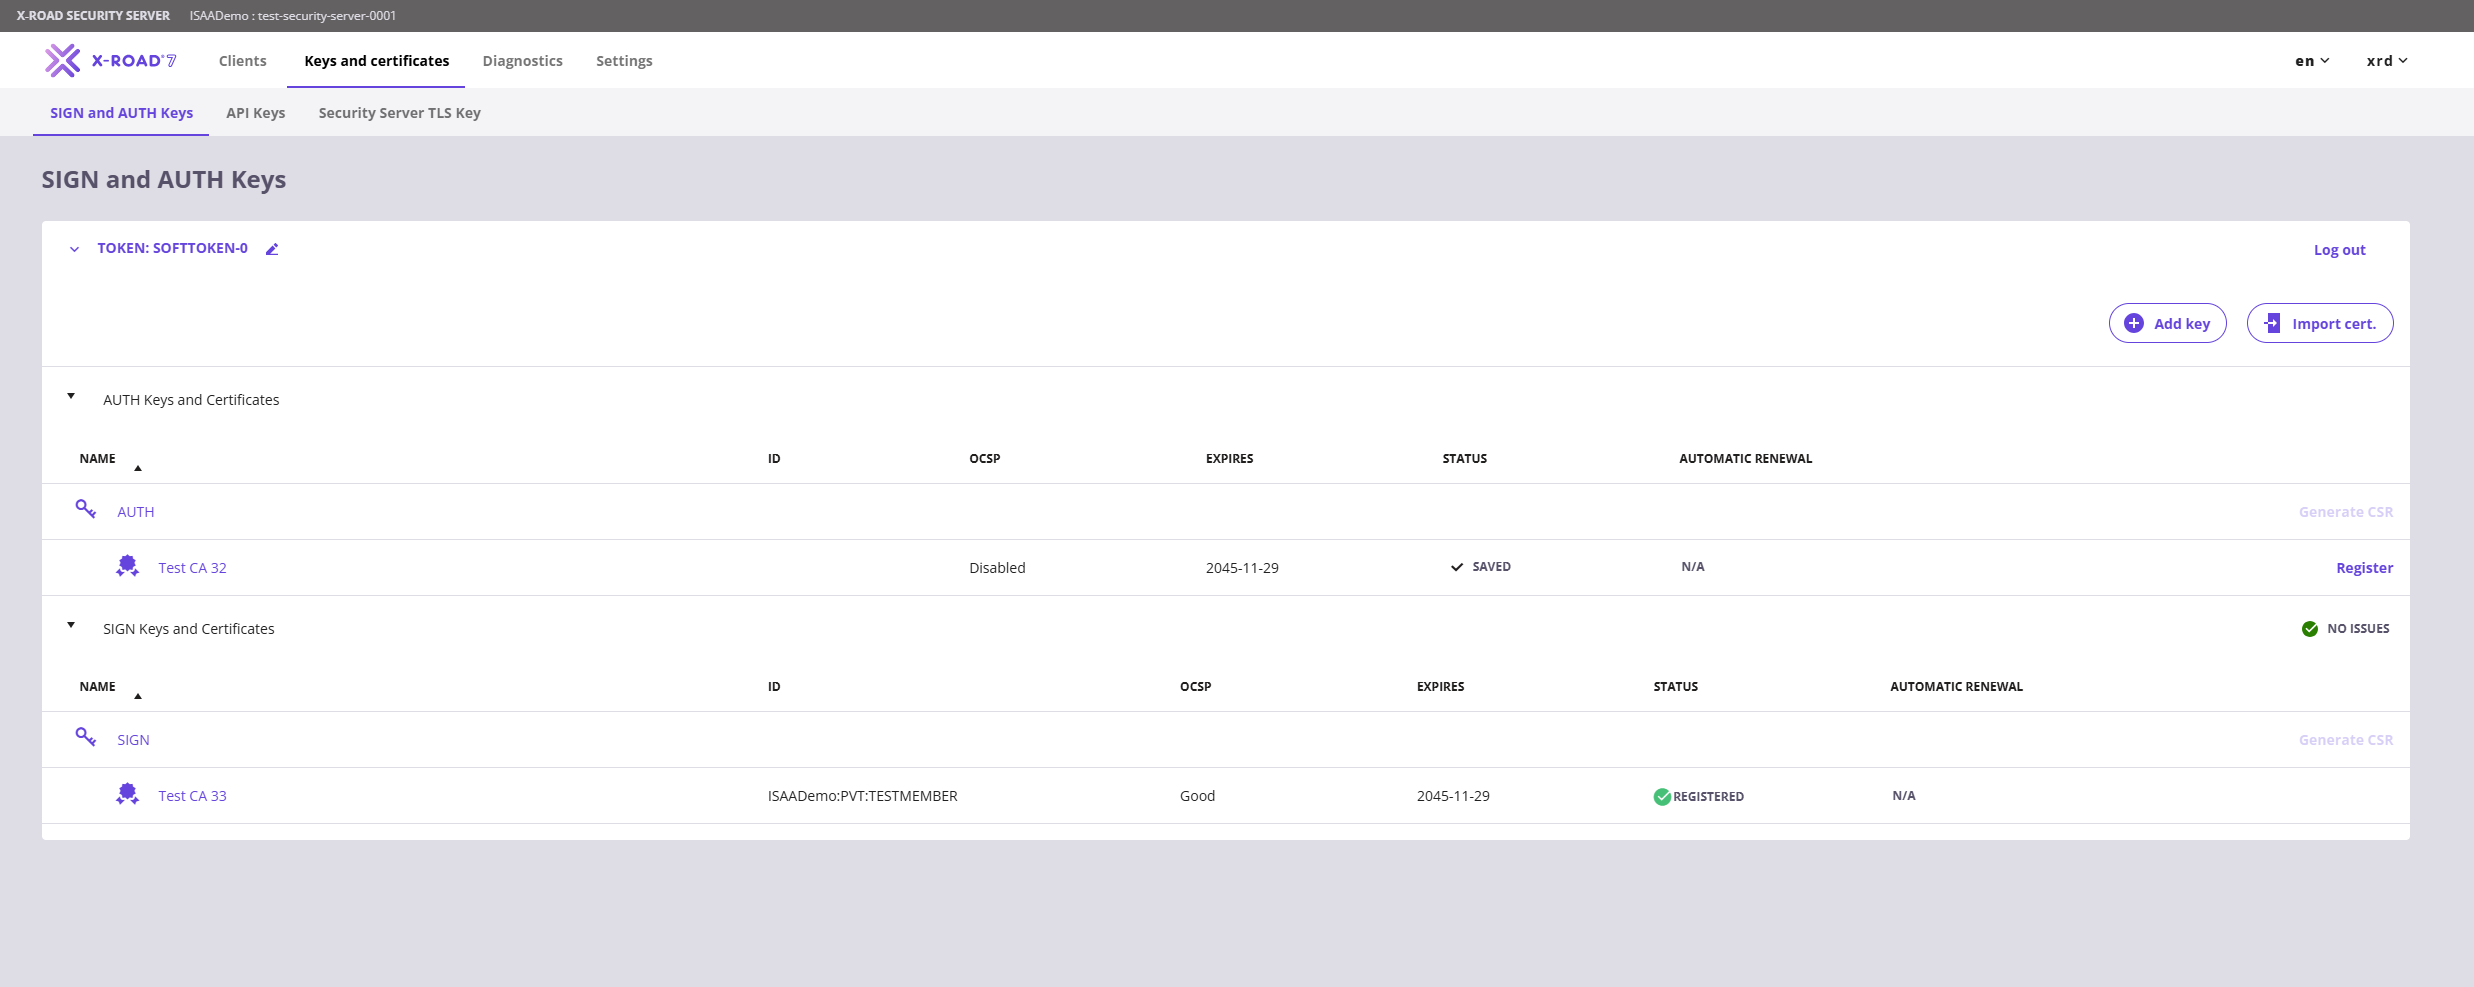
Upon receiving the signed certificates from ADEL, go to the same Keys and Certificates page and import both certificates (one by one) by clicking the Import Cert button.
After the import, the certificates page will change to this state, but we still need to enable and register the authentication certificate.
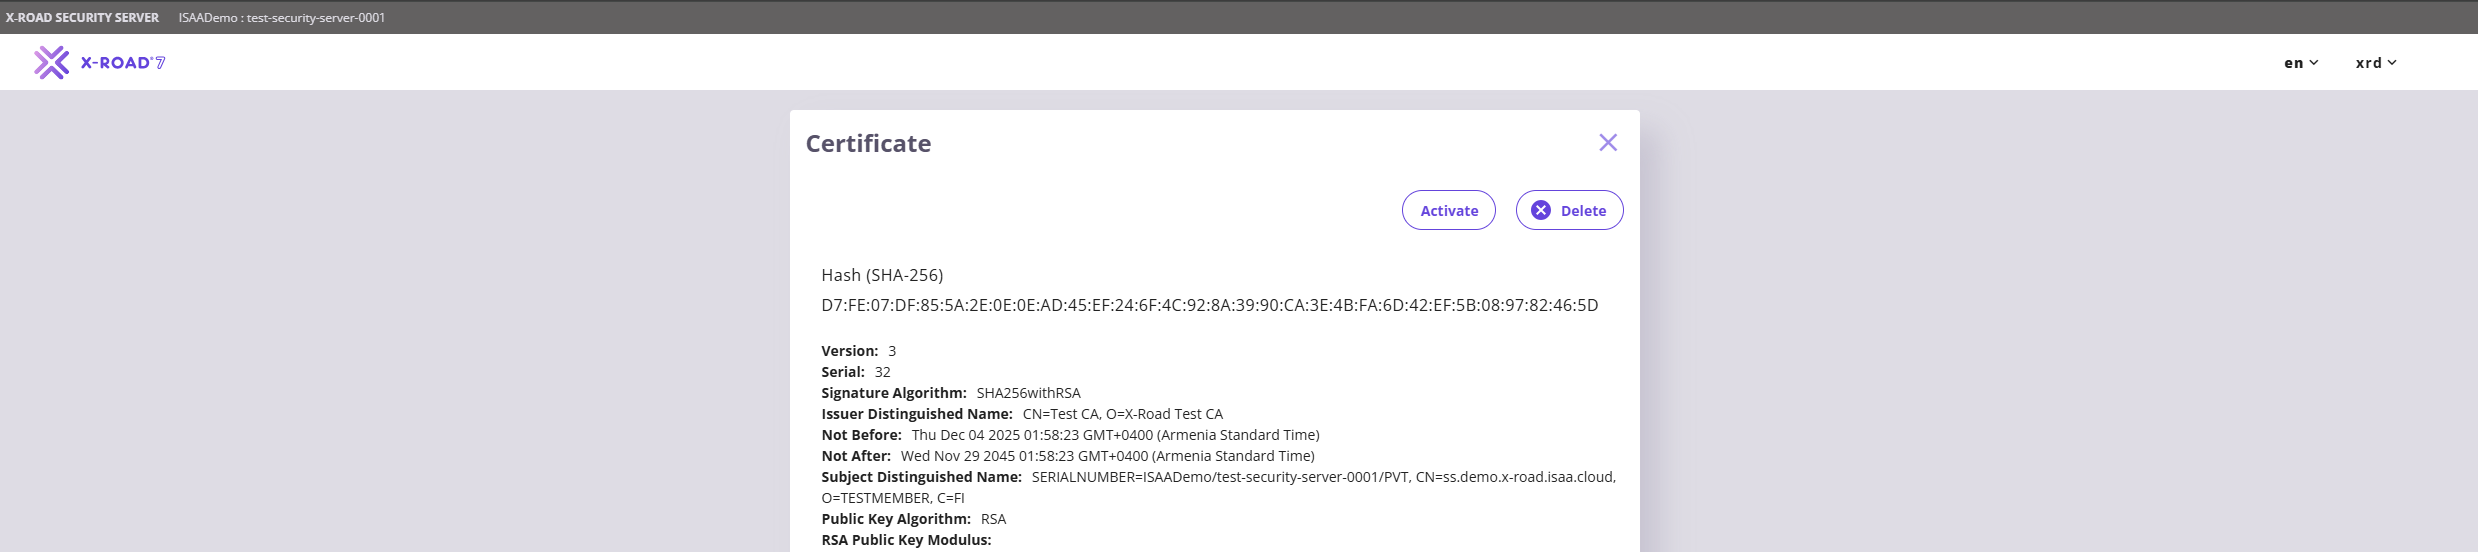
To finalize the certificate configuration, open the authentication certificate by clicking its name, and on the page that opens, click the Activate button.
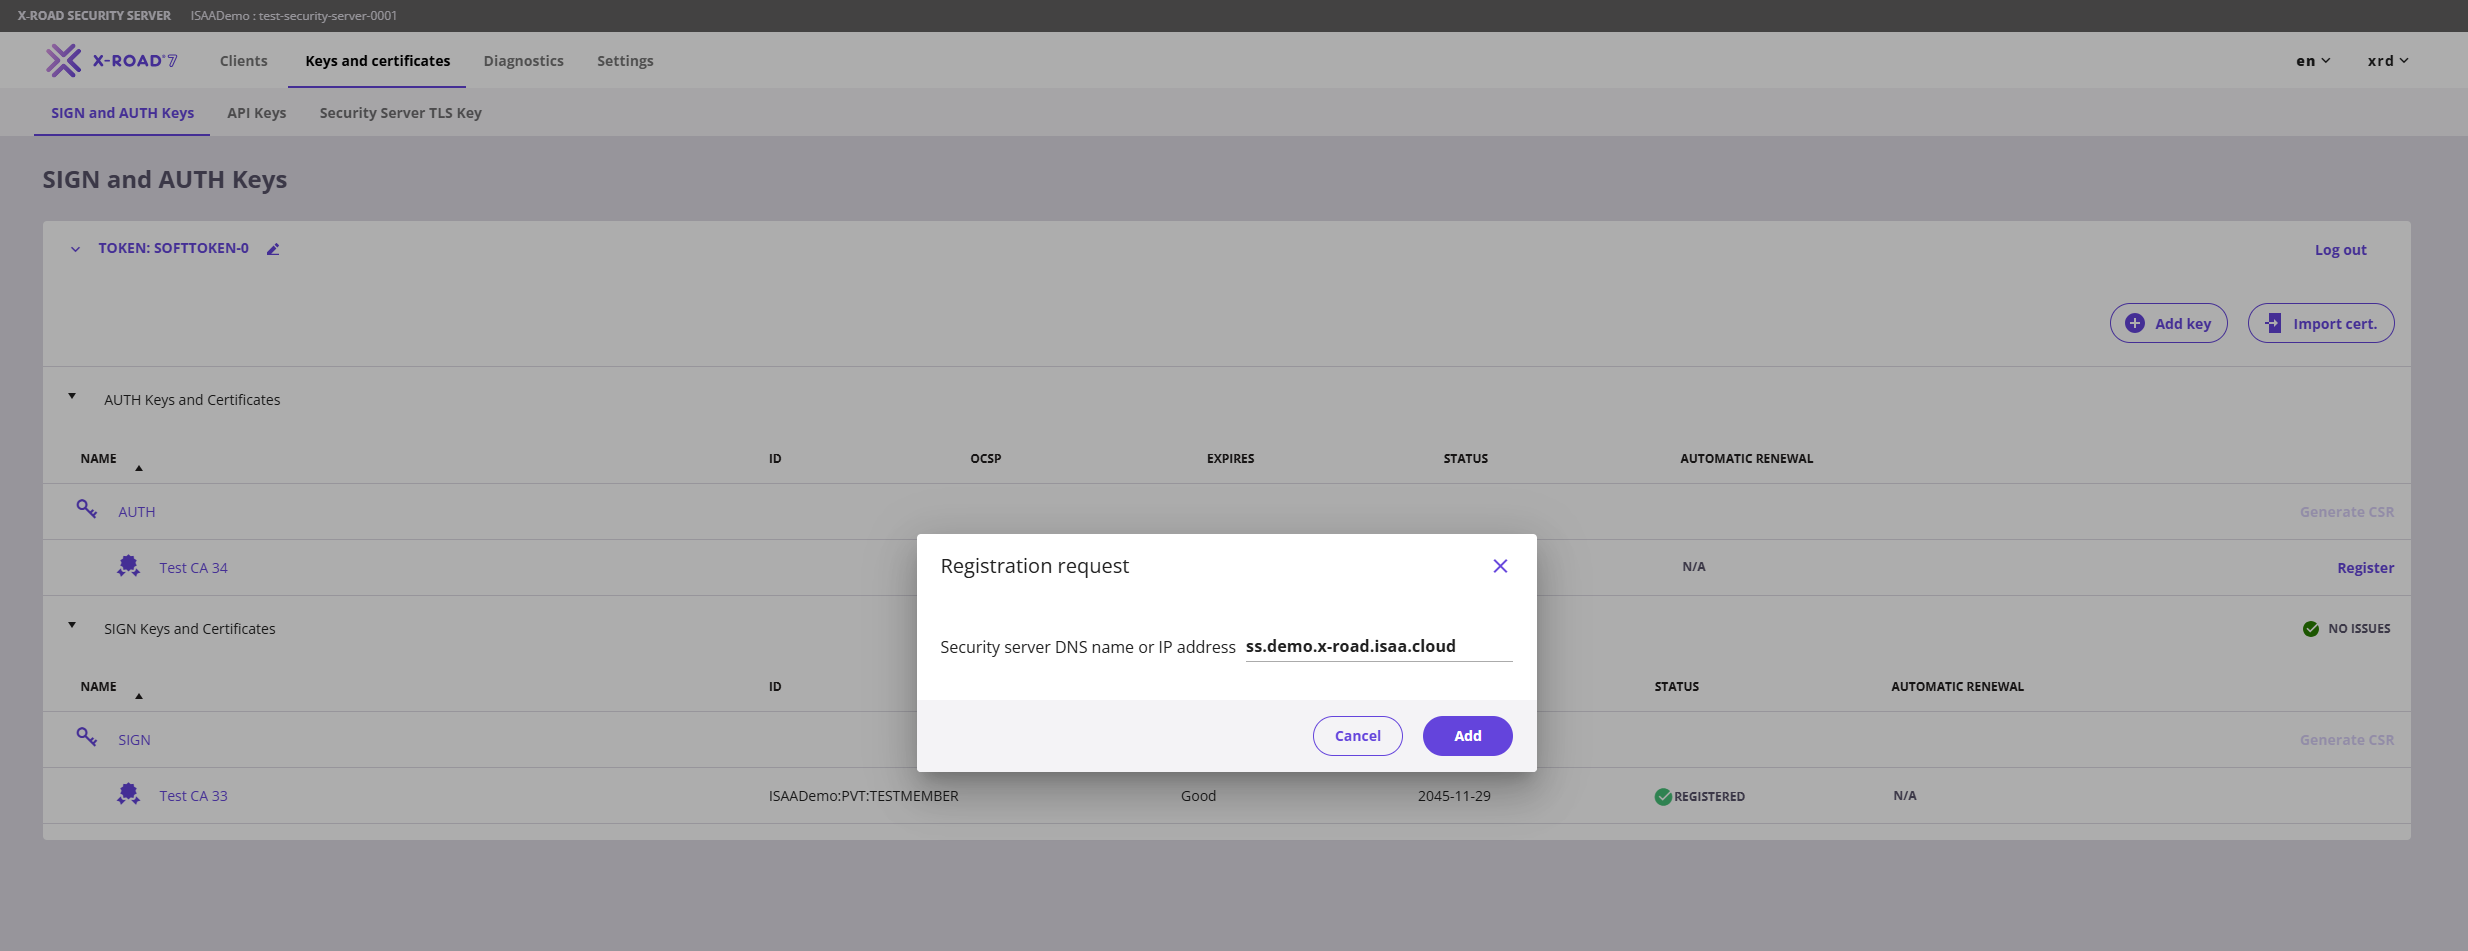
Once activated, go back and click the Register button on the left side of the authentication certificate. Enter the DNS name or IP address in the modal that opens and click the Add button.
The status of the certificate will change from Saved to Registration in progress.
Please note that the certificate and client registration requests are approved manually on the Central Server. If the registration process is taking too long, please contact ADEL at adel@isaa.am.
First Subsystem
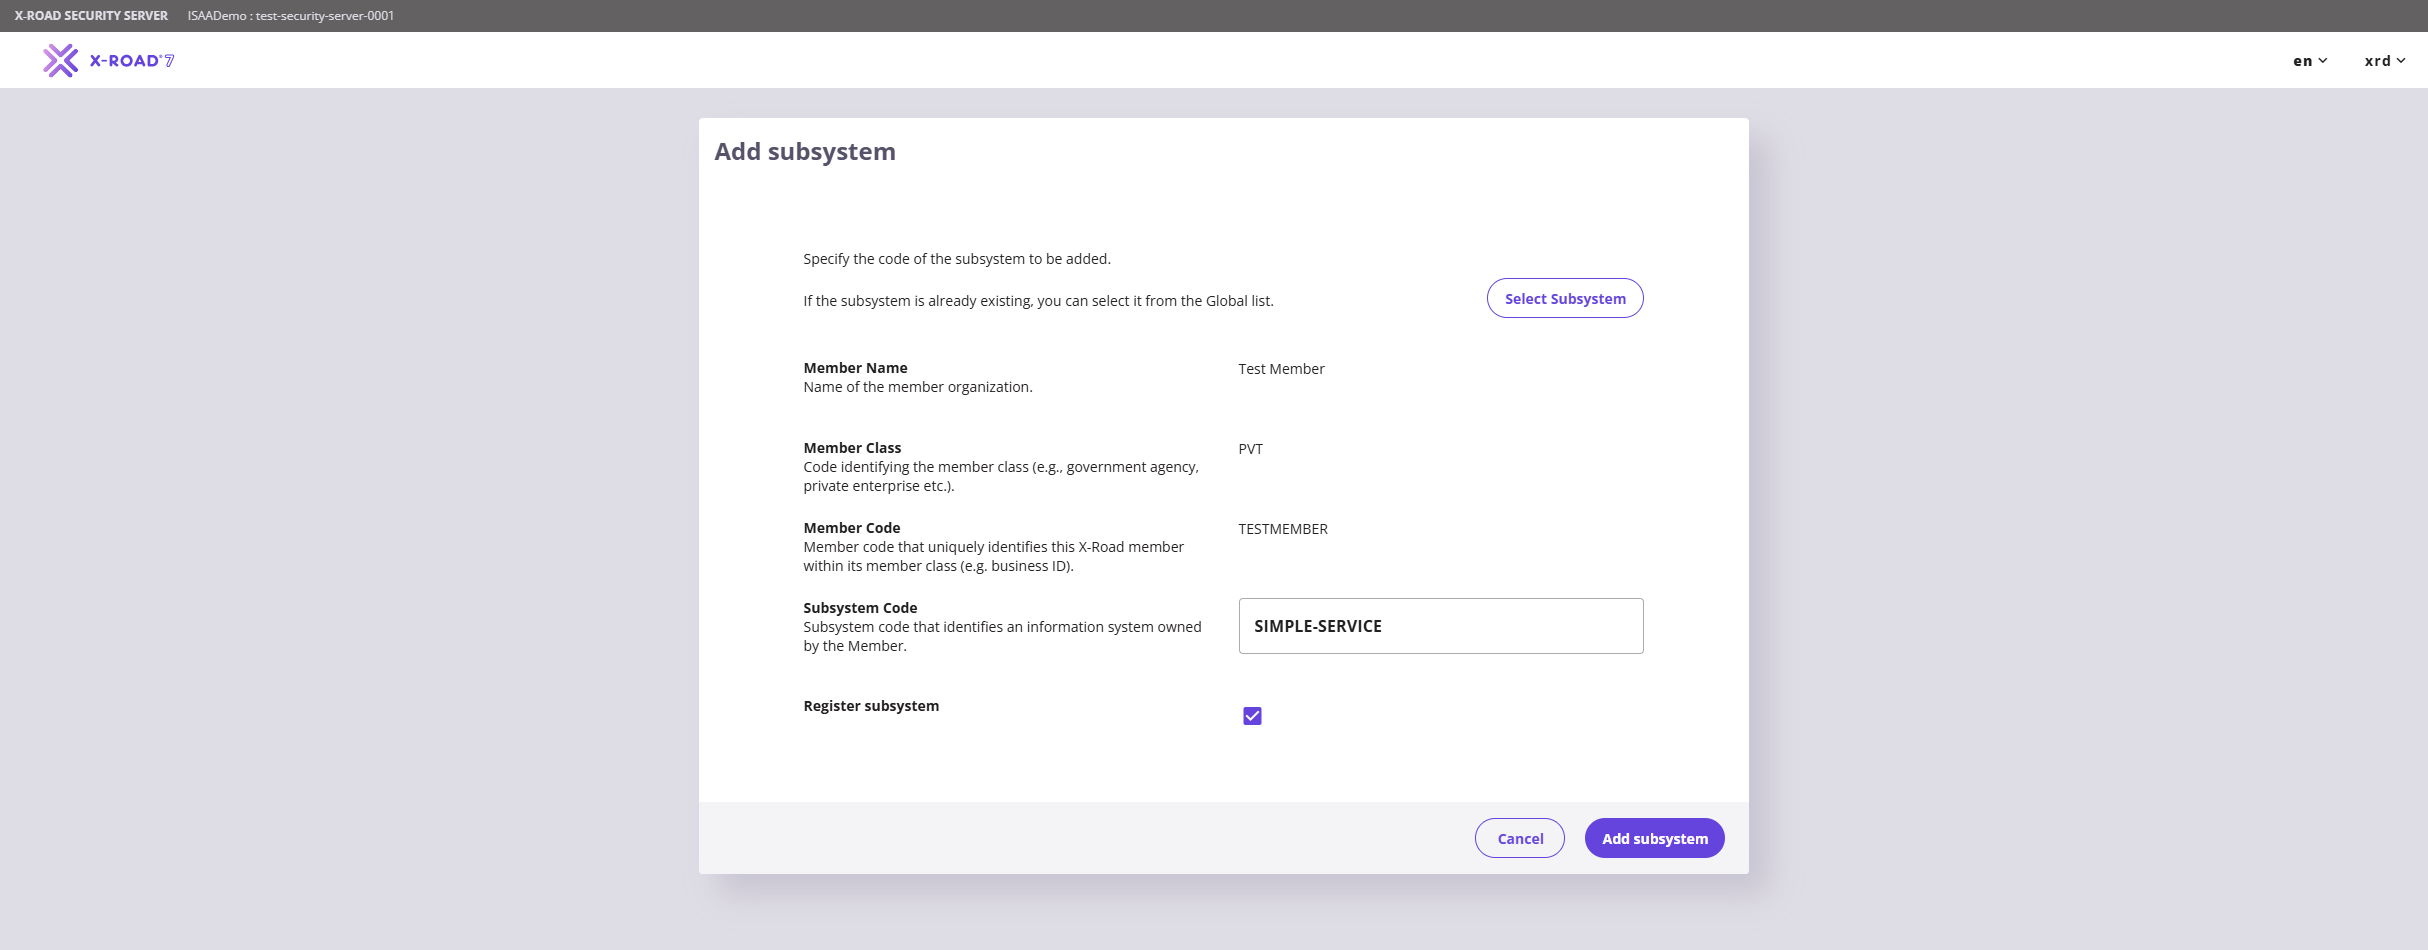
When the authentication certificate is registered, we can finally create the Security Server's first subsystem. To do this, go to the Clients page from the top menu and click the Add Subsystem button. This will open a page where you need to specify the subsystem code.
To ensure a standardized ecosystem, please follow these conventions for the Subsystem Code:
- Choose a value that reflects the specific information system, software, or service the subsystem represents, not the organization itself (the organization is already identified by the Member Code).
- Keep it short (roughly 5-12 characters) and use a single descriptive word where possible, e.g.
billing,intranet. - Use lowercase by default. Avoid ALL-CAPS or inconsistent casing, since identifiers are case sensitive.
- The value must follow the Identifier Character Restrictions.
Note
A subsystem is uniquely identified on the X-Road network by the combination of Member Class, Member Code and Subsystem Code, so the Subsystem Code only needs to be unique within your own member.
Keep the Register Subsystem checkbox active so it will send the client registration request.
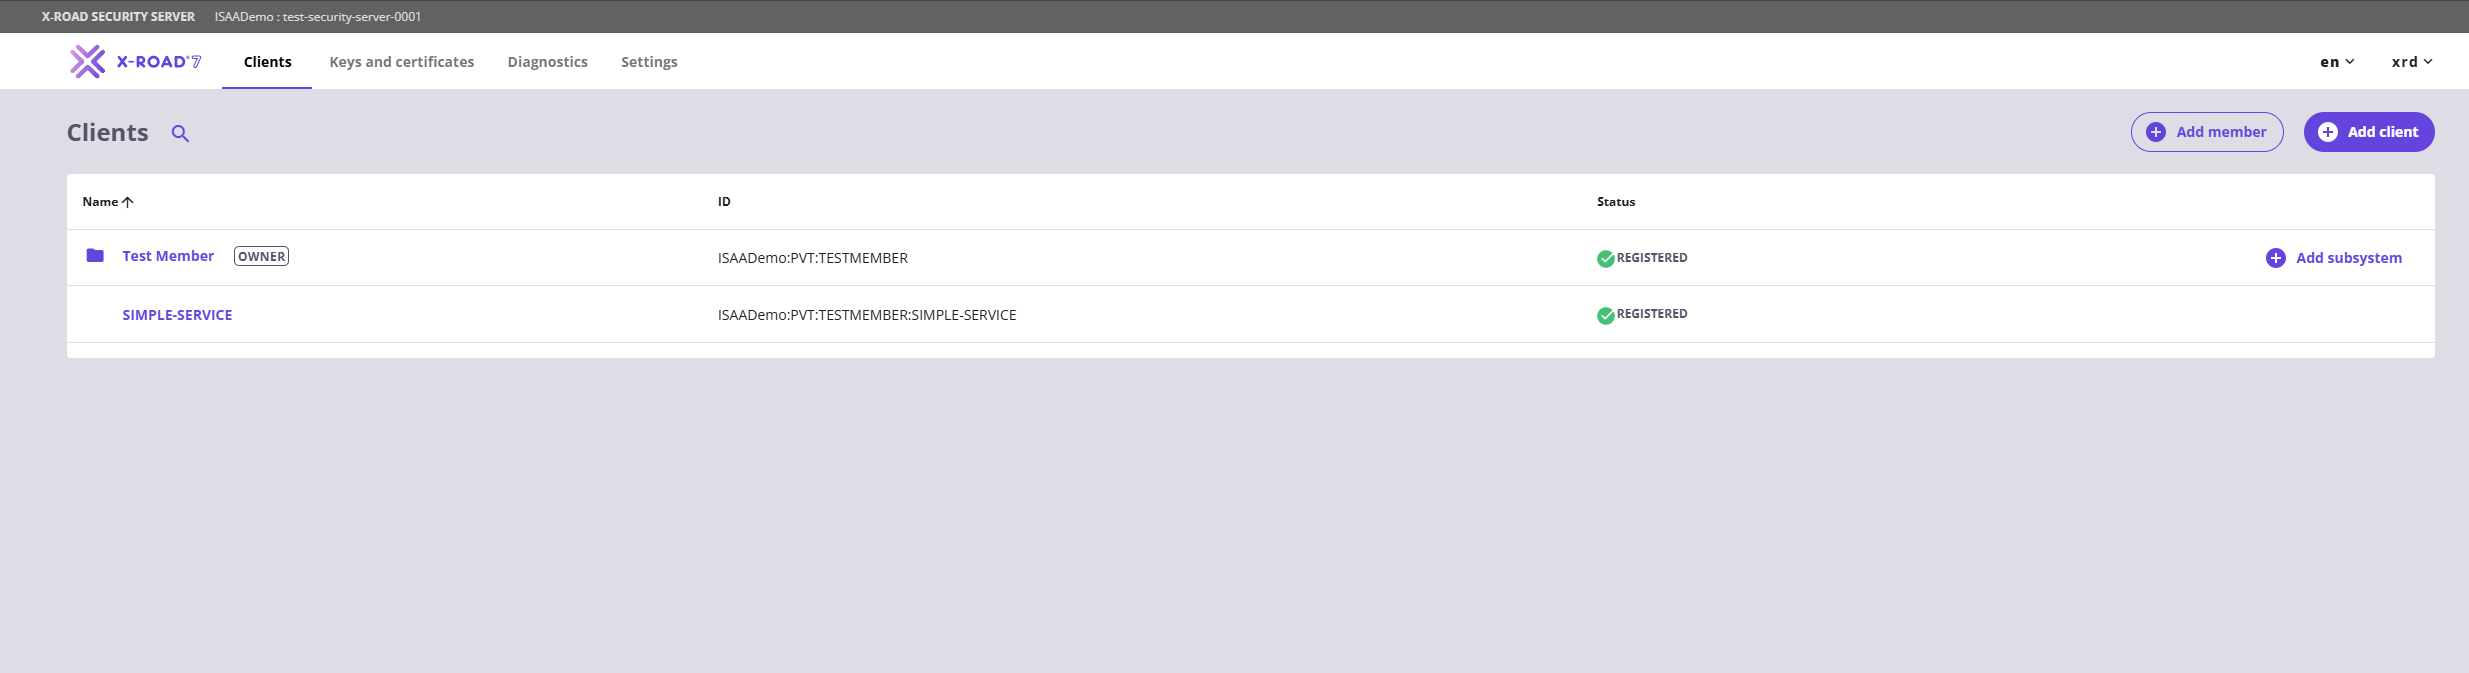
Once the client registration is approved, the subsystem is ready to be used.
Video Guide
Below is a video walkthrough covering the steps described in this guide.